
Creating a Registration Form allows you to set up your entire registration process through an end-to-end form builder, including the configuration of general settings, fields, layout and presentation, products, custom messaging, notifications and more.
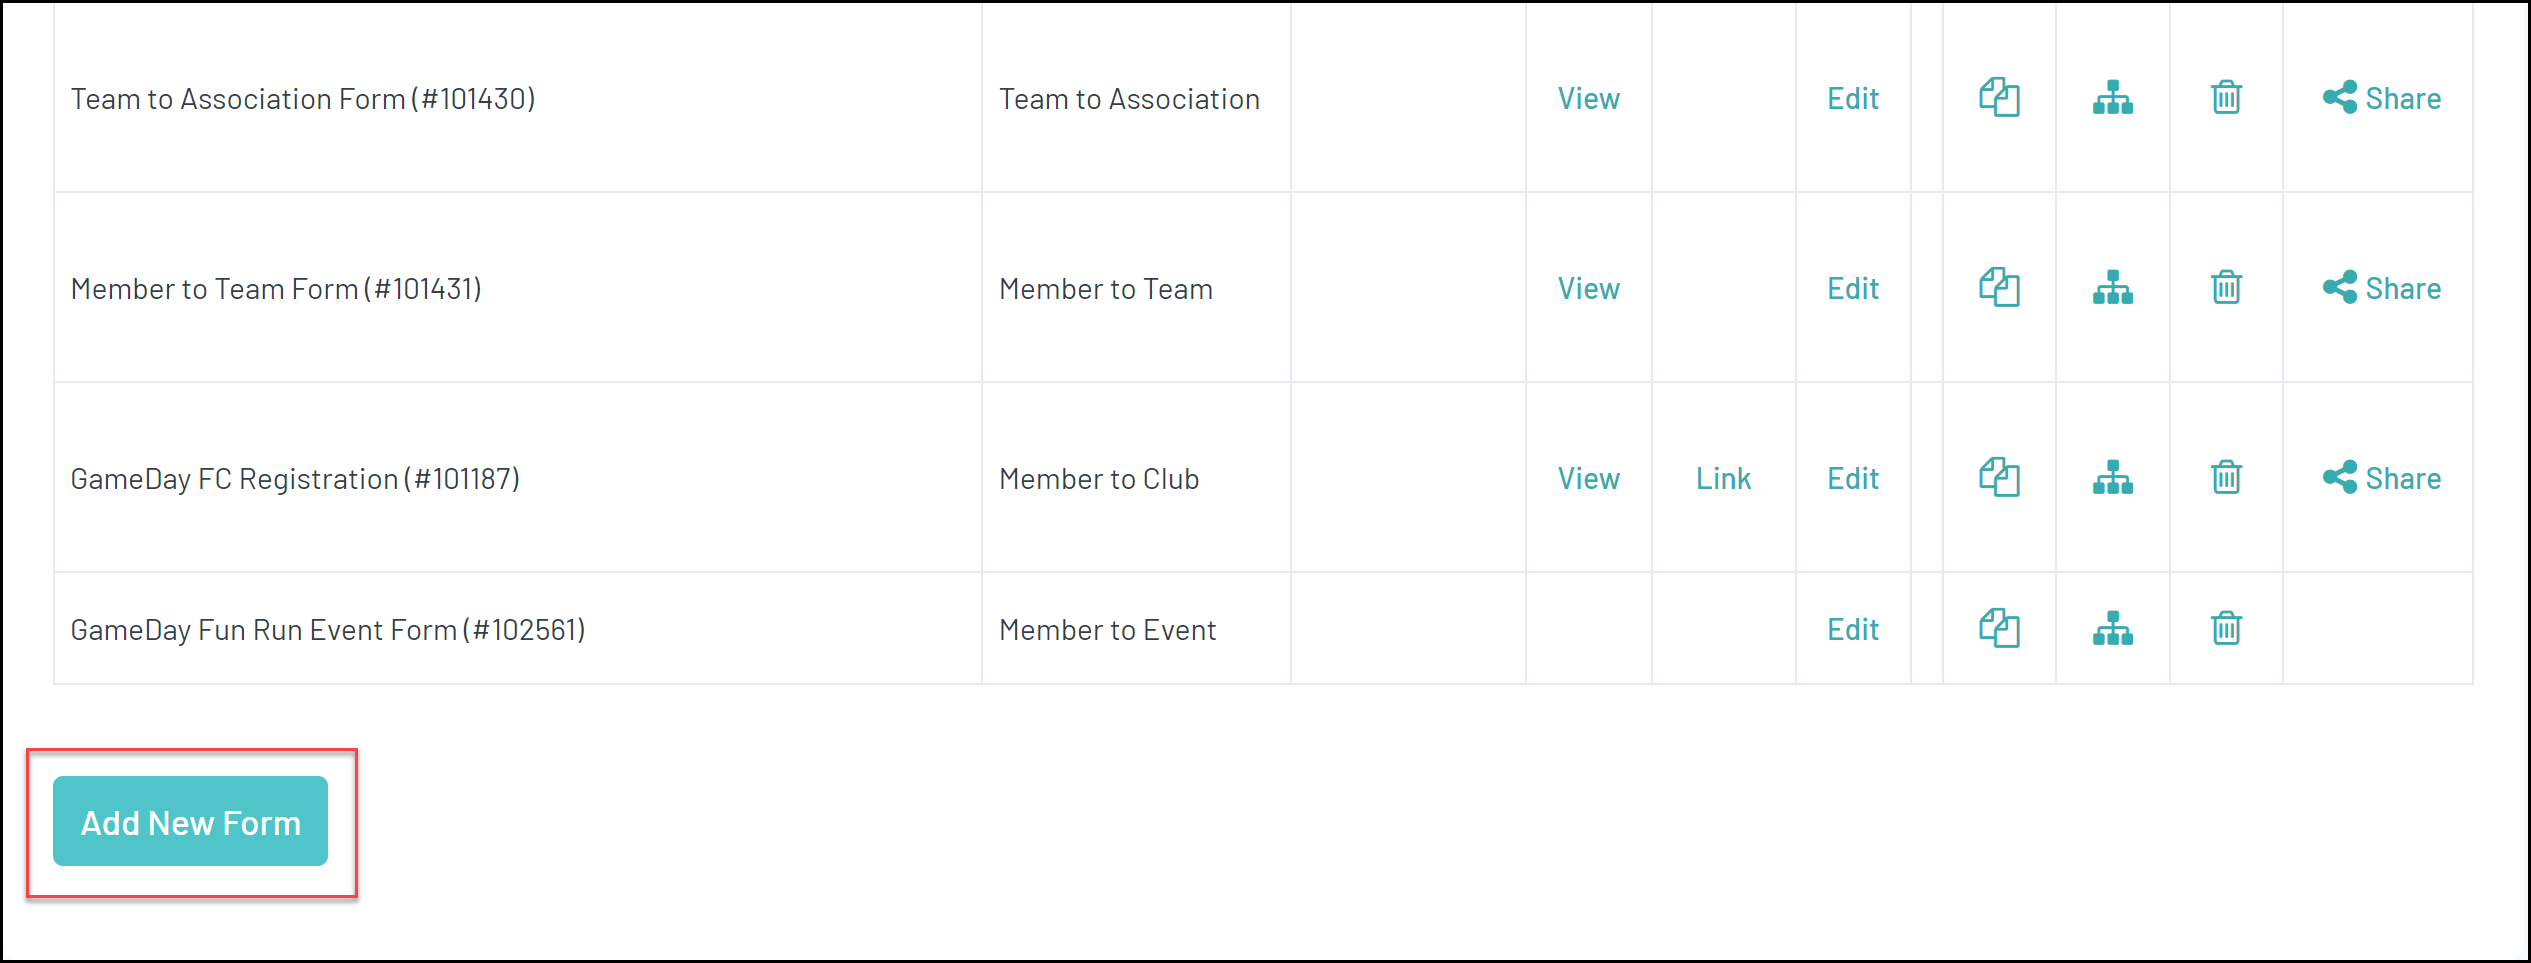
To get started with the Registration Form setup process you will firstly need to add a new form.
Note: If you are part of a hierarchy, you can directly access any Registration Forms that have been created and shared with you from a higher level. In this instance, find your form in the Parent Body Forms section and click EDIT, then skip directly to step 2 below.
1. Add a Registration Form
1a. To Add a new Registration Form, open the Registrations menu, then select REGISTRATION FORMS.

1b. Click ADD NEW FORM
2. Settings Tab
2a. Complete the Settings tab. This will allow you to choose some basic Registration Form configurations.


Form Name: The name of your registration form as displayed to registrants.
Type of Form: Please see our Registration Form Types article for further information
Form Enabled: This option will activate or deactivate your Registration Form
Payment is Compulsory: When this option is selected and there is at least one mandatory product, registrants must pay online at the time of registration in order to complete the registration.
Allow Member to Register as: This will allow members to select a Member Type. You can choose which Member Types are applicable to this form.
Allow multiple registration: This will allow multiple members to be registered in the same session.
Registration Options:
- Allow all registrations: Anyone can register through this registration form.
- Allow new registrations if not in the national system: Only members who aren't currently in the national database can register.
- Allow new registrations only if in national system: Only members who are currently in the national database can register.
- Allow existing members only: Only allows members who have previously registered through Passport.
- Allow new registrations only: Only allows new members to register through this form.
- Allow new only if already in the association: This will allow new members to register, but only if they are already entered into the association database.
Colour Options: Allows you to apply a Primary, Secondary and Background colour scheme to the registration form.
Click CONTINUE when you are ready to move forward.
3. Fields Tab
3a. Use the Fields tab to apply display settings to any of the fields available to you in your database. This includes standard fields and custom fields.
Note: Fields are hierarchical, meaning that if a level above your organisation (e.g. National Body, State, Zone, Association etc.) has set a Field as Editable or Compulsory, it cannot be removed from your Registration Form and must be answered by participants.
Each available field will appear here with a visibility setting along the top of the screen. Fields can be configured to display in several ways:
- Hidden - This means the field does not appear at all.
- Read Only - This field will display, however it cannot be edited - only use this option if the answer to this field won't change (e.g Birth Certificate Number, Date of Birth etc.).
- Editable - This means that the field will display, but it can be left blank if they don't want to answer this field.
- Compulsory - This means that the field will display, and it must be completed before saving.
- Add Only (Compulsory) - This means the field will appear as compulsory but it cannot be edited once it has been completed.
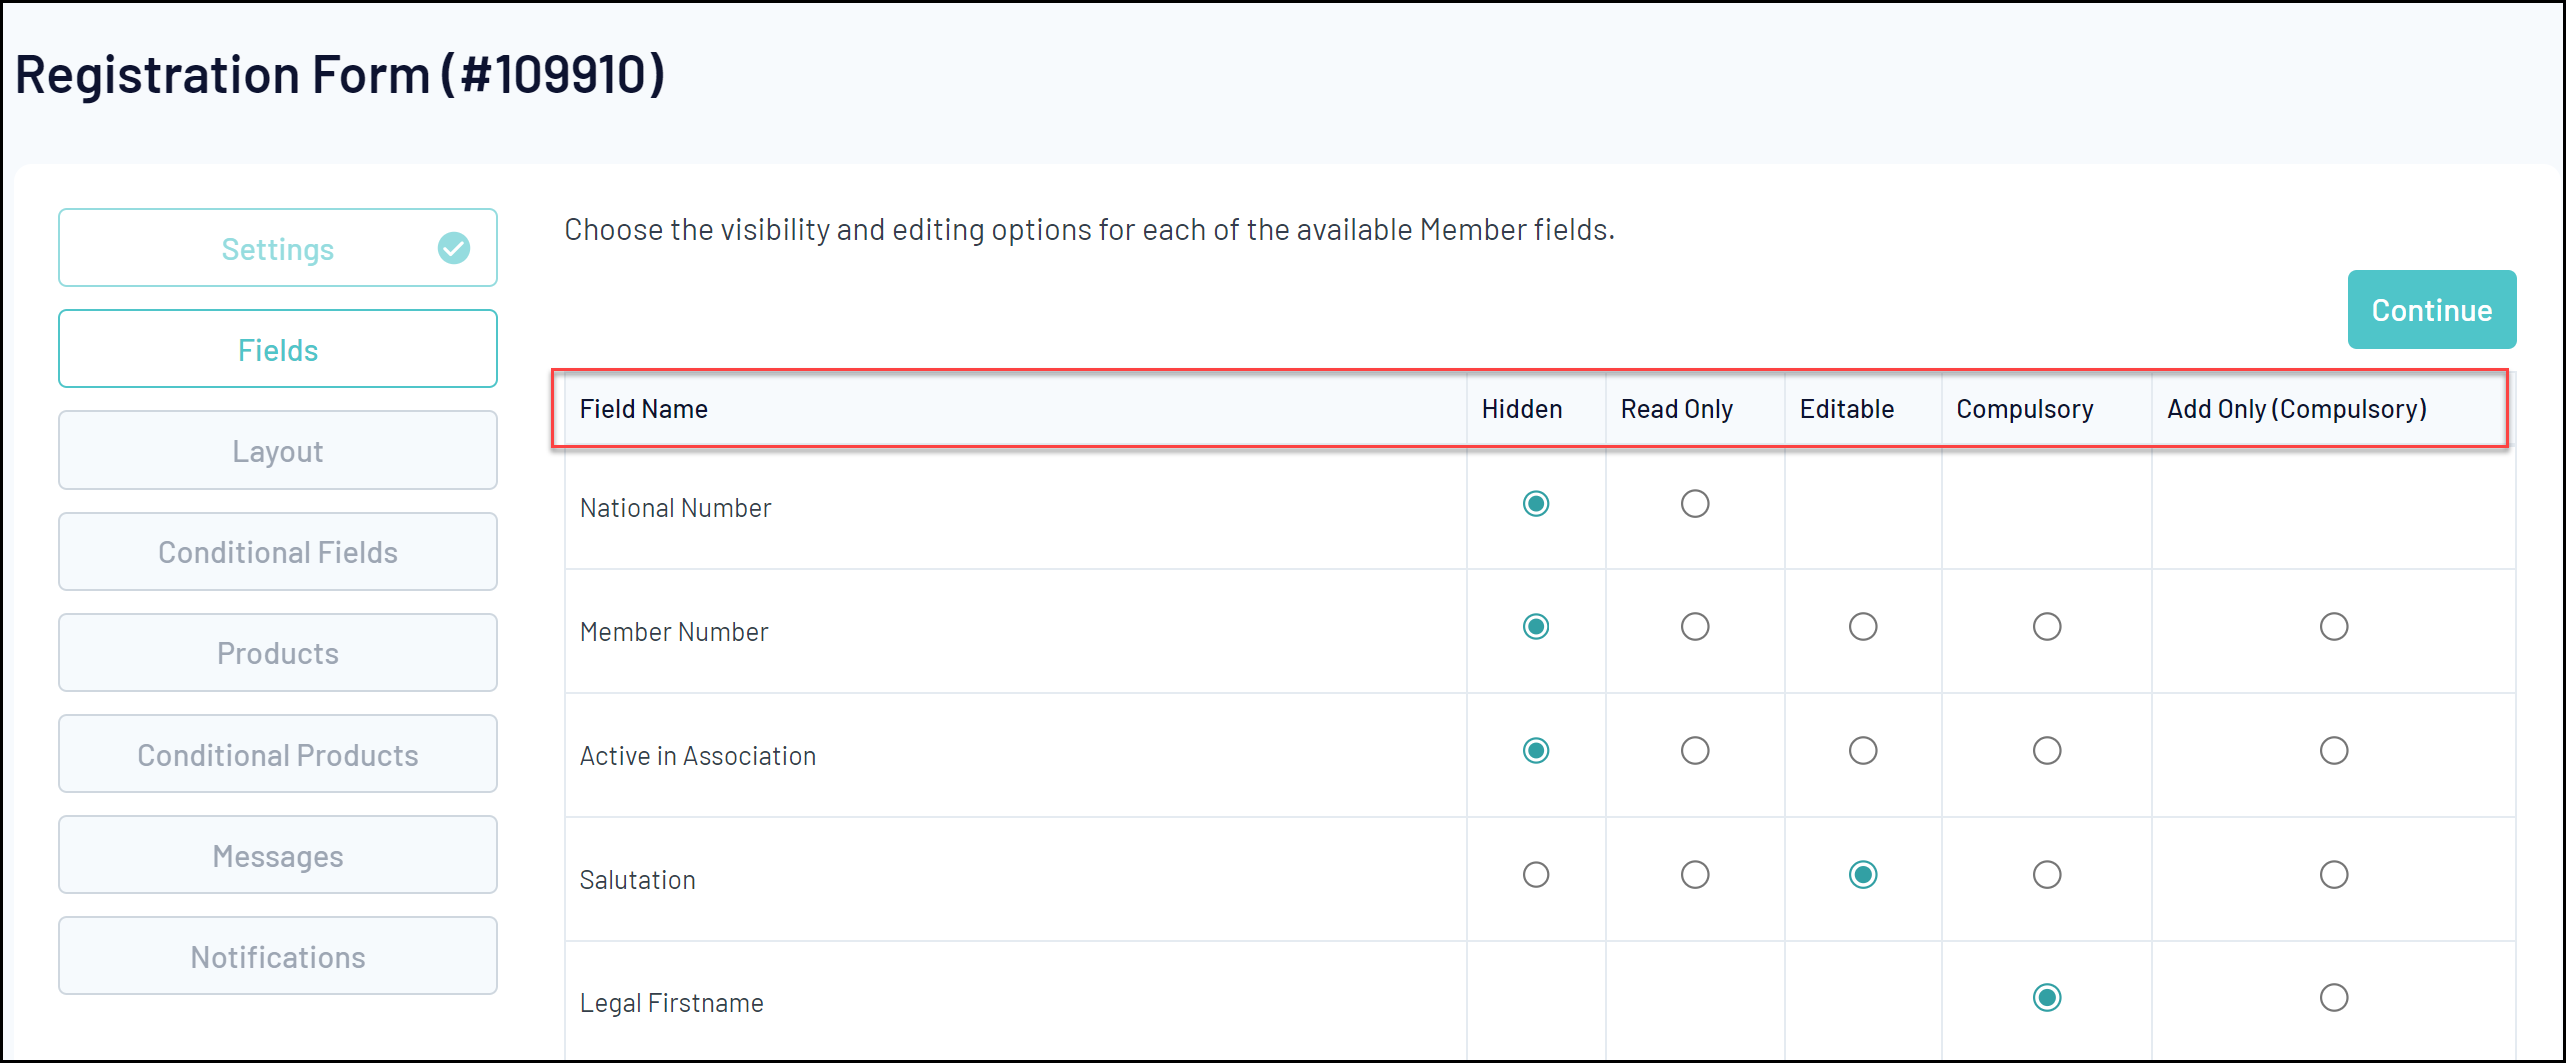
Click CONTINUE when you are ready to move forward.
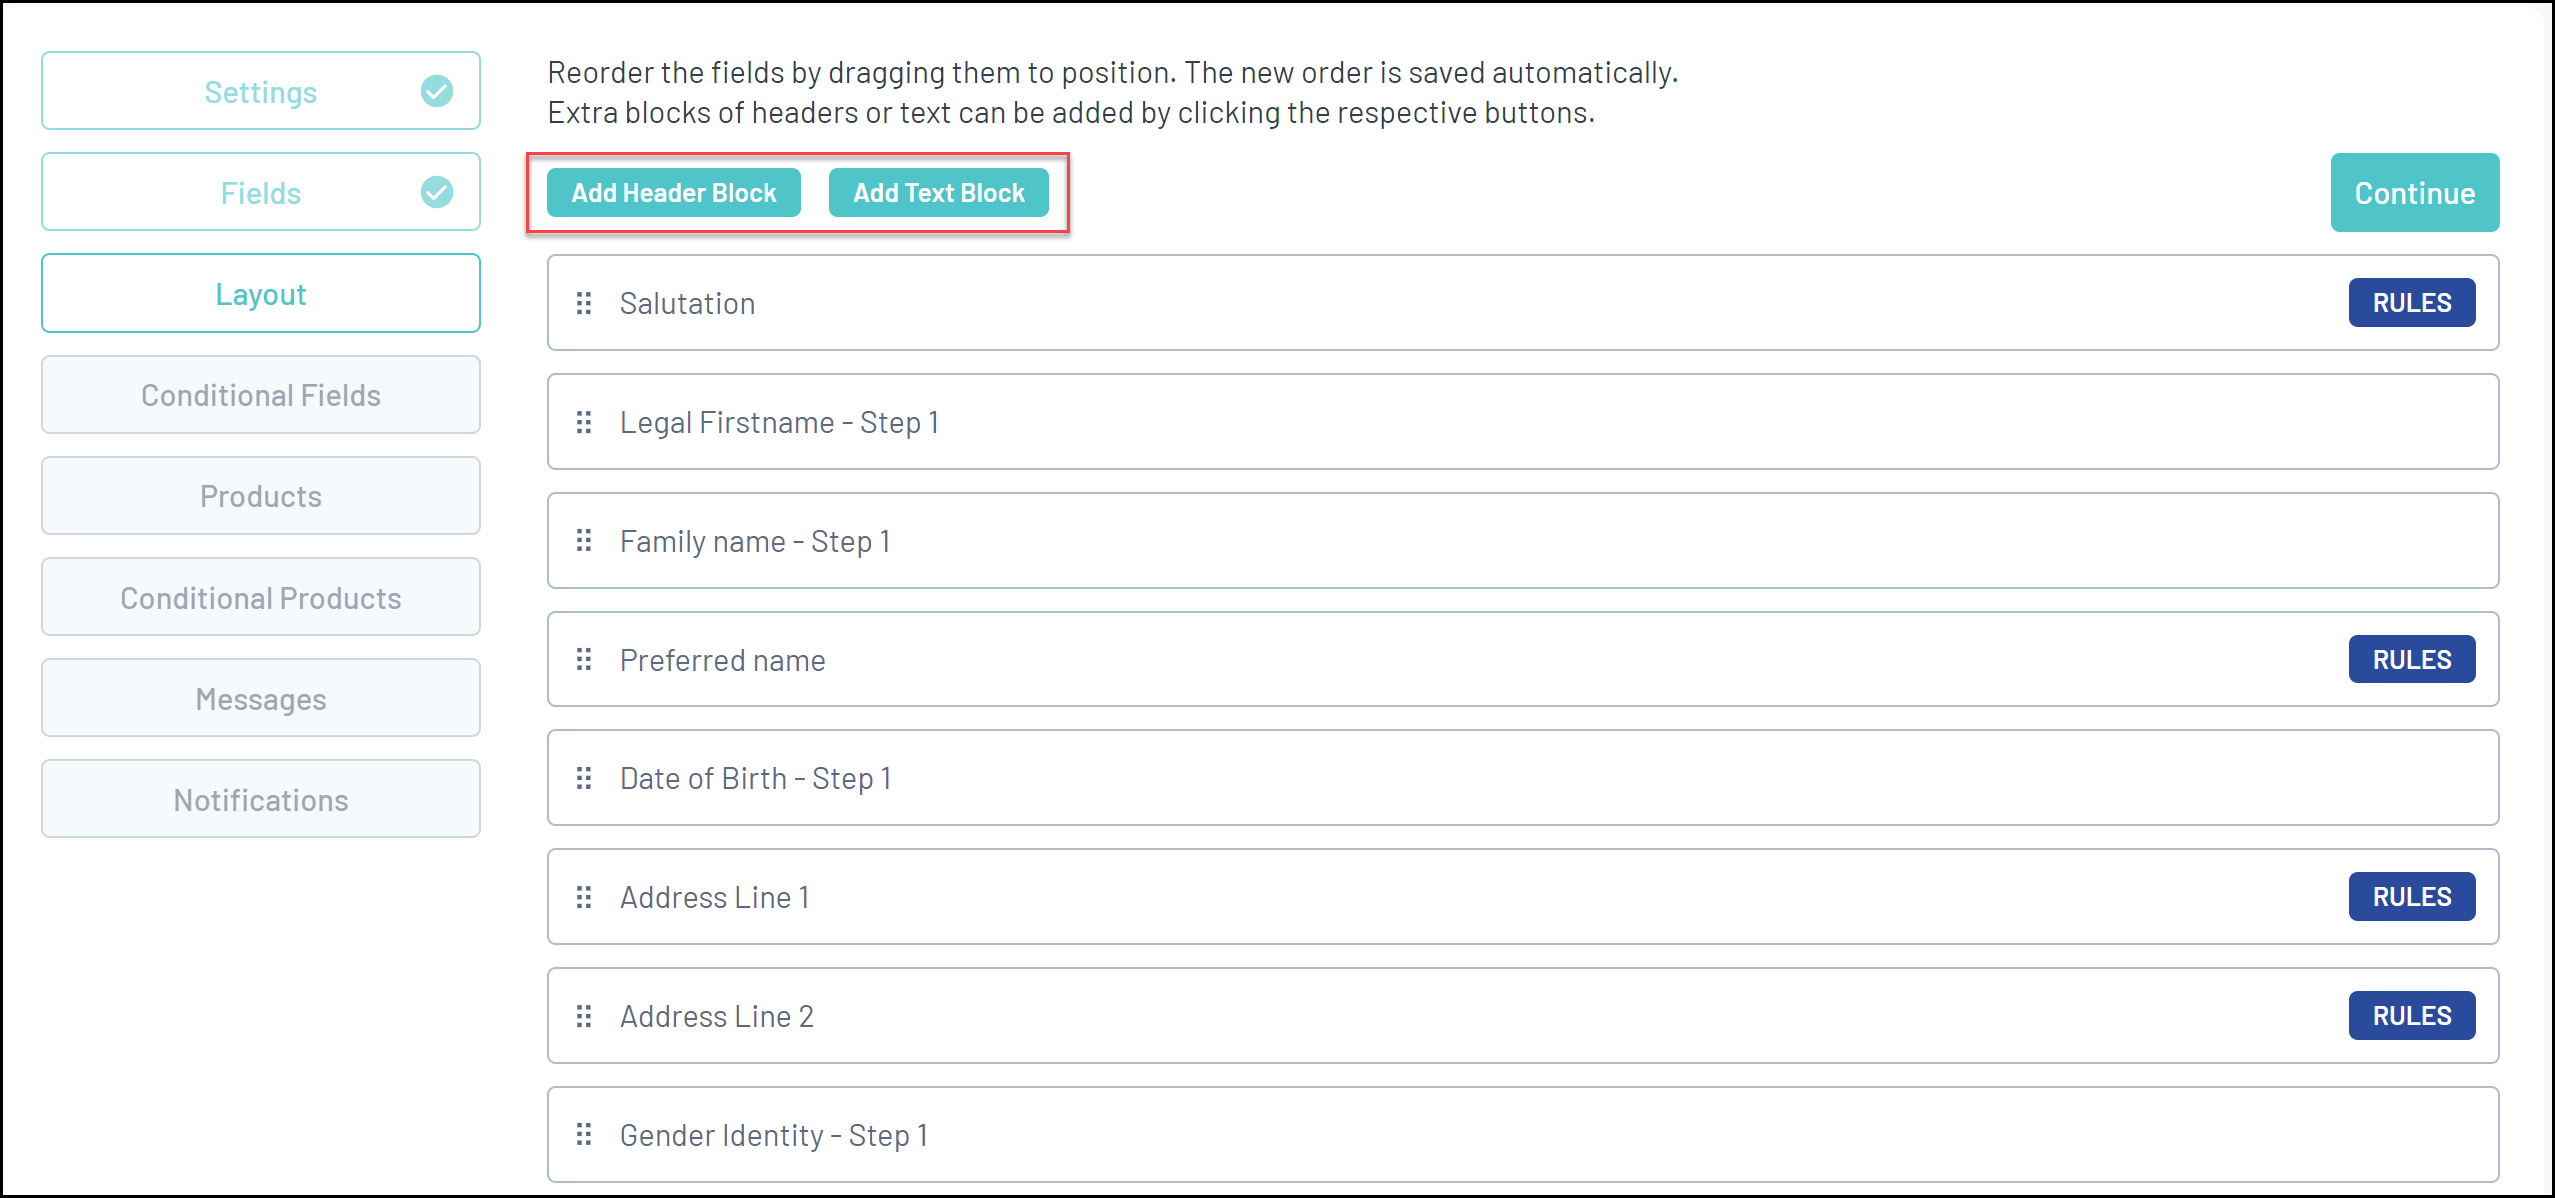
4. Layout Tab
4a. Use the Layout tab to configure the order in which your fields display on your registration form.
To arrange the order of your fields, click and drag the field and drop it to move it into a position on the form. It will save automatically.
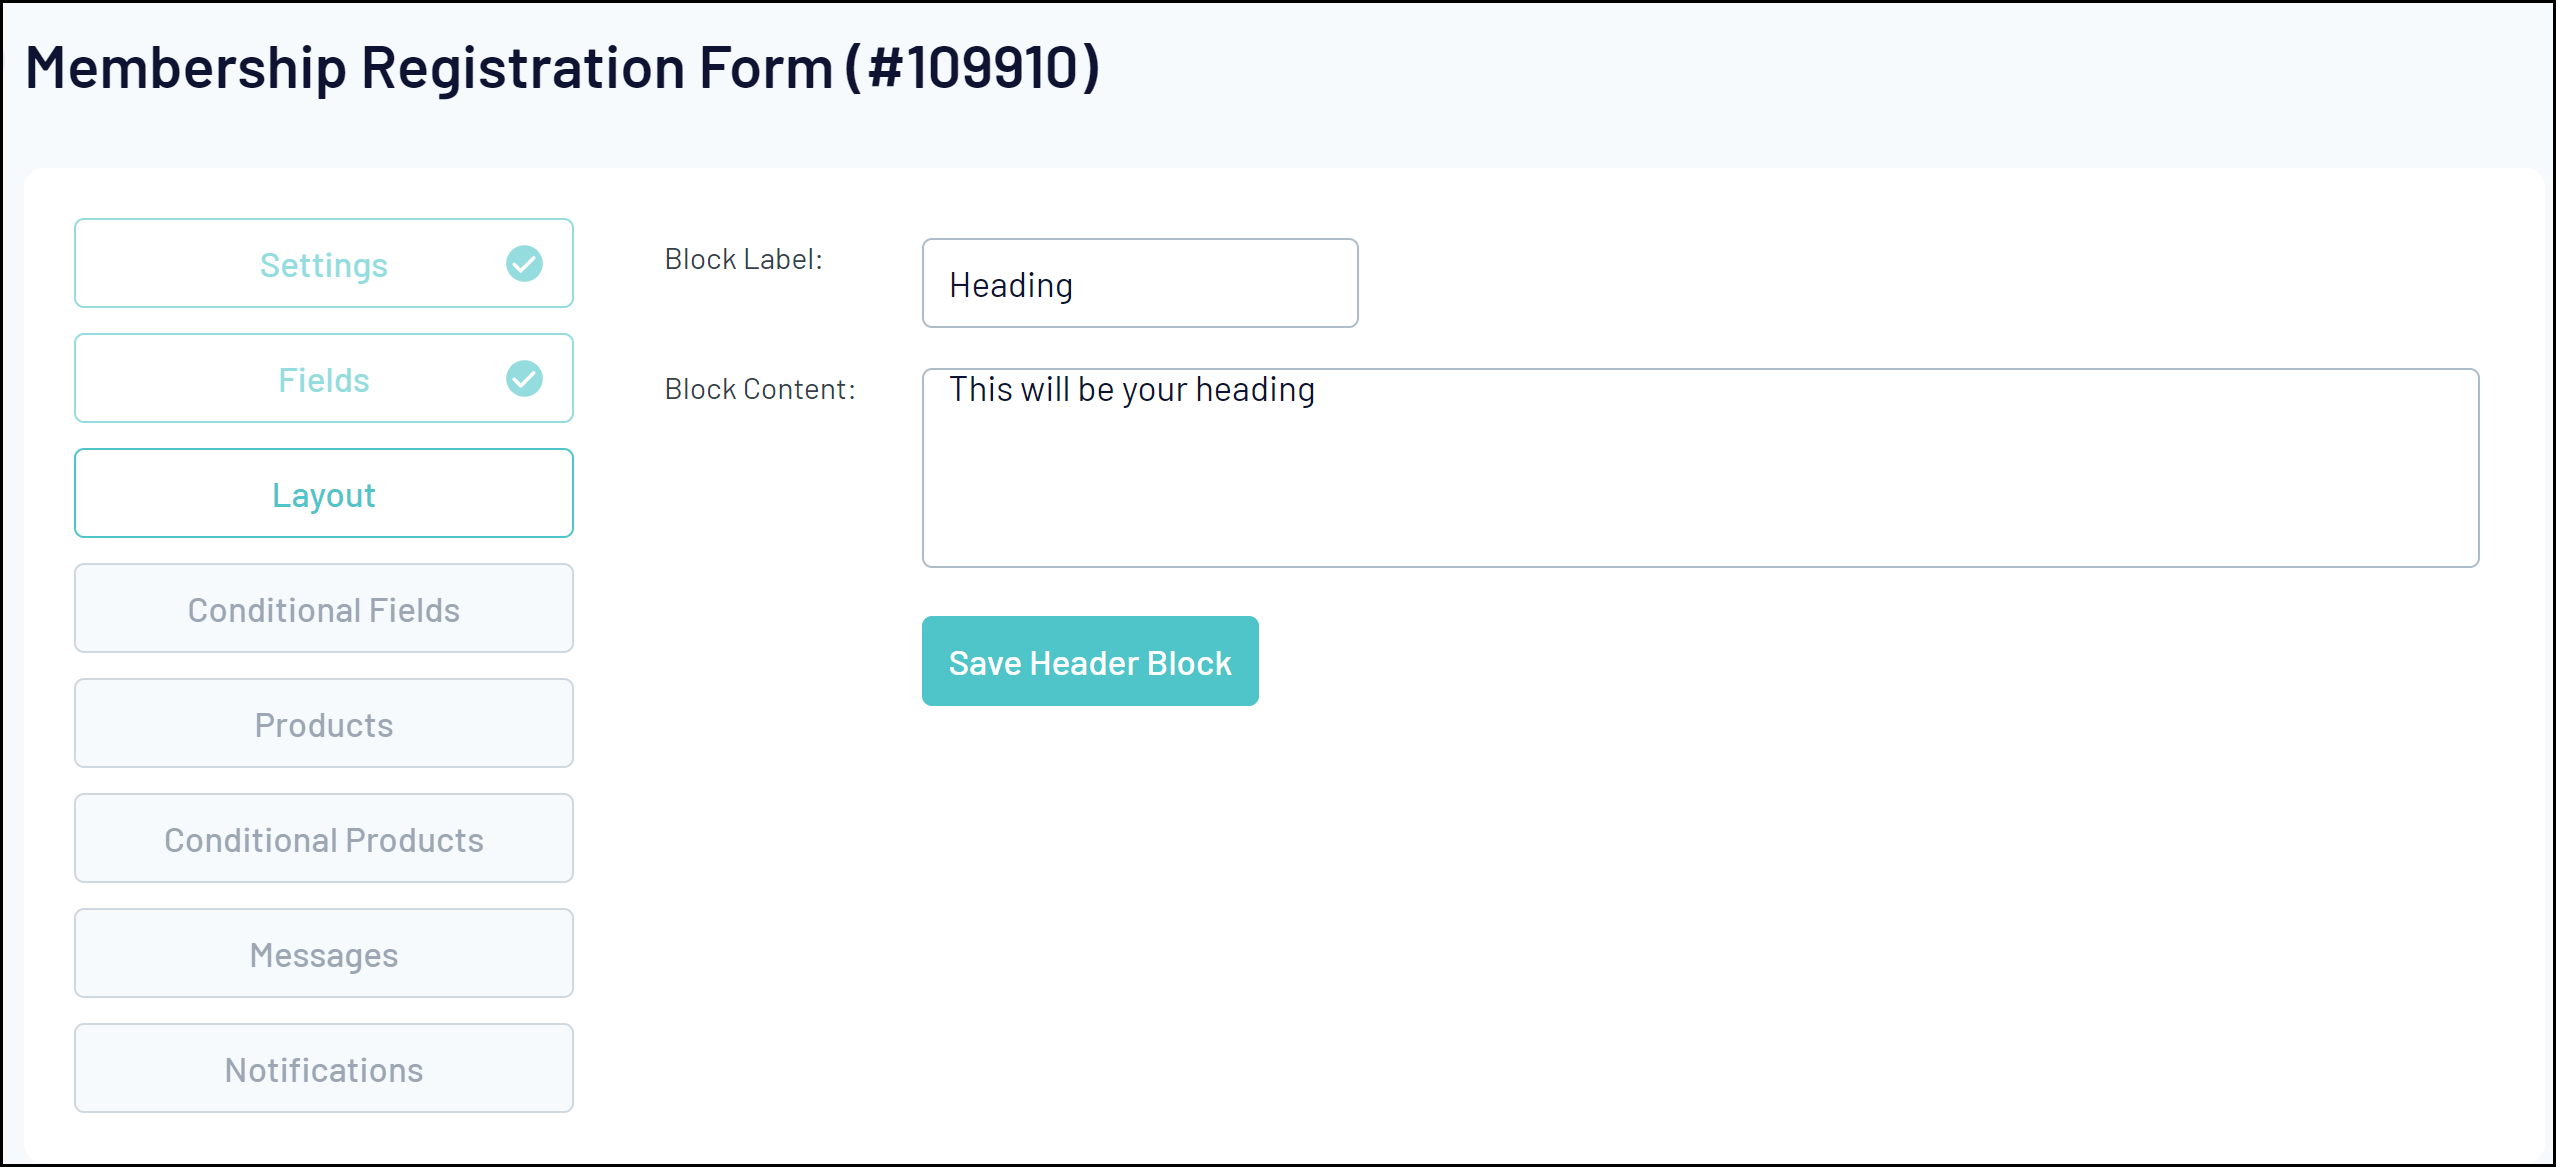
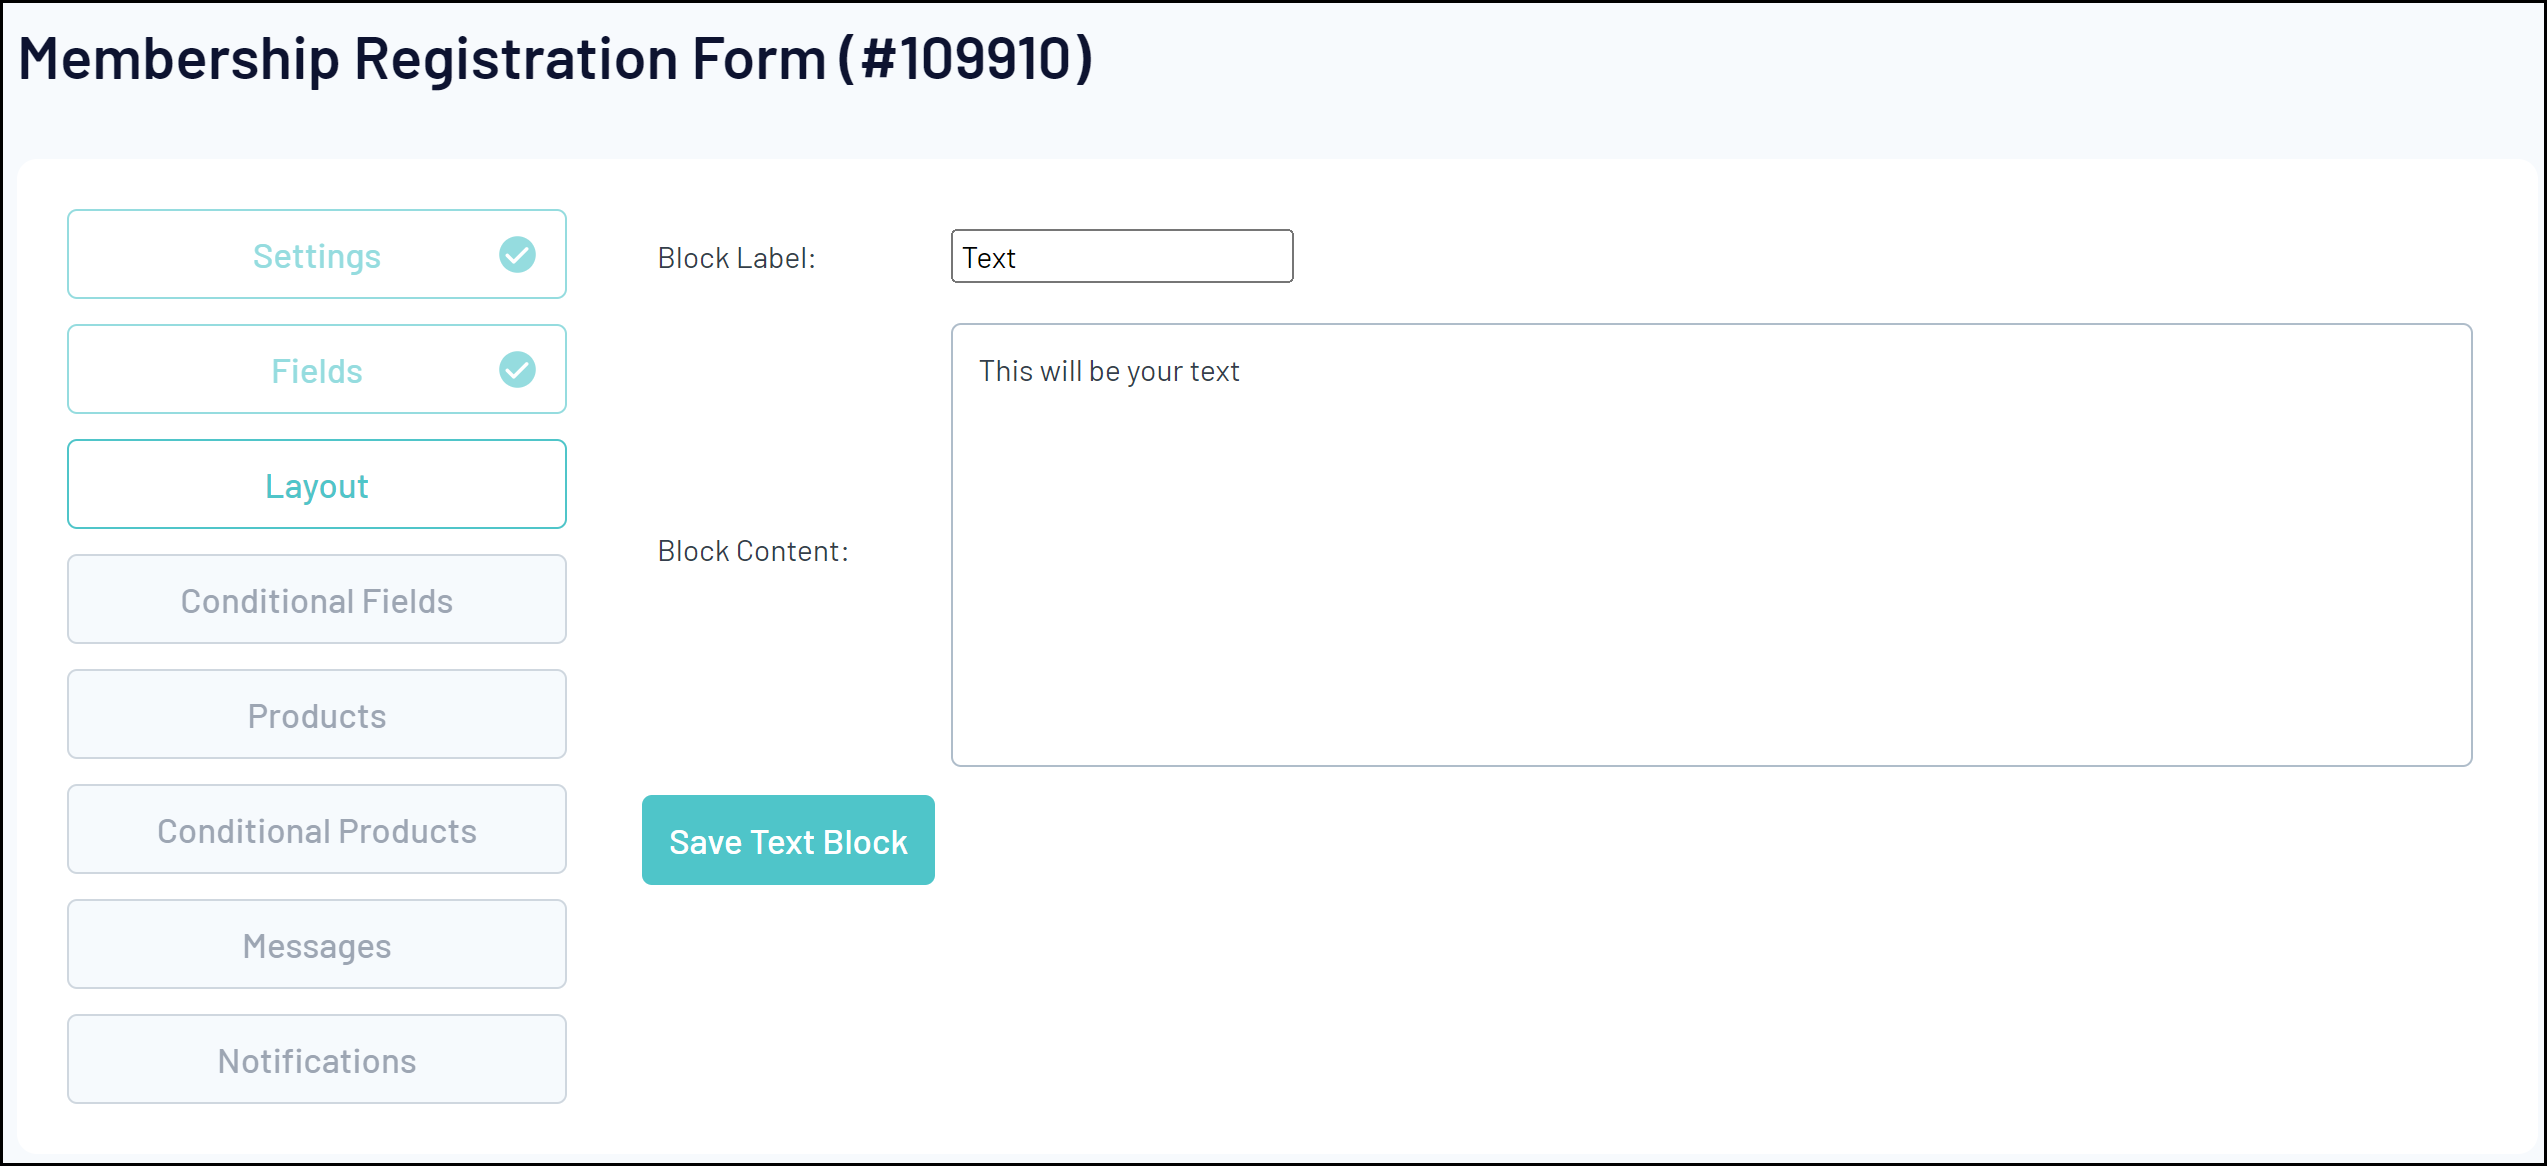
The Layout tab also allows you to add custom Text Blocks and Header Blocks on your registration form, using the ADD HEADER BLOCK or ADD TEXT BLOCK options:
Enter your Block Label and Content. The Block Label will be the name of the Header/Text Block in the Layout tab, and the Block Content will be what displays on your registration form.
Below is an example that will display This will be your heading

Below is a text block that will display This will be your text

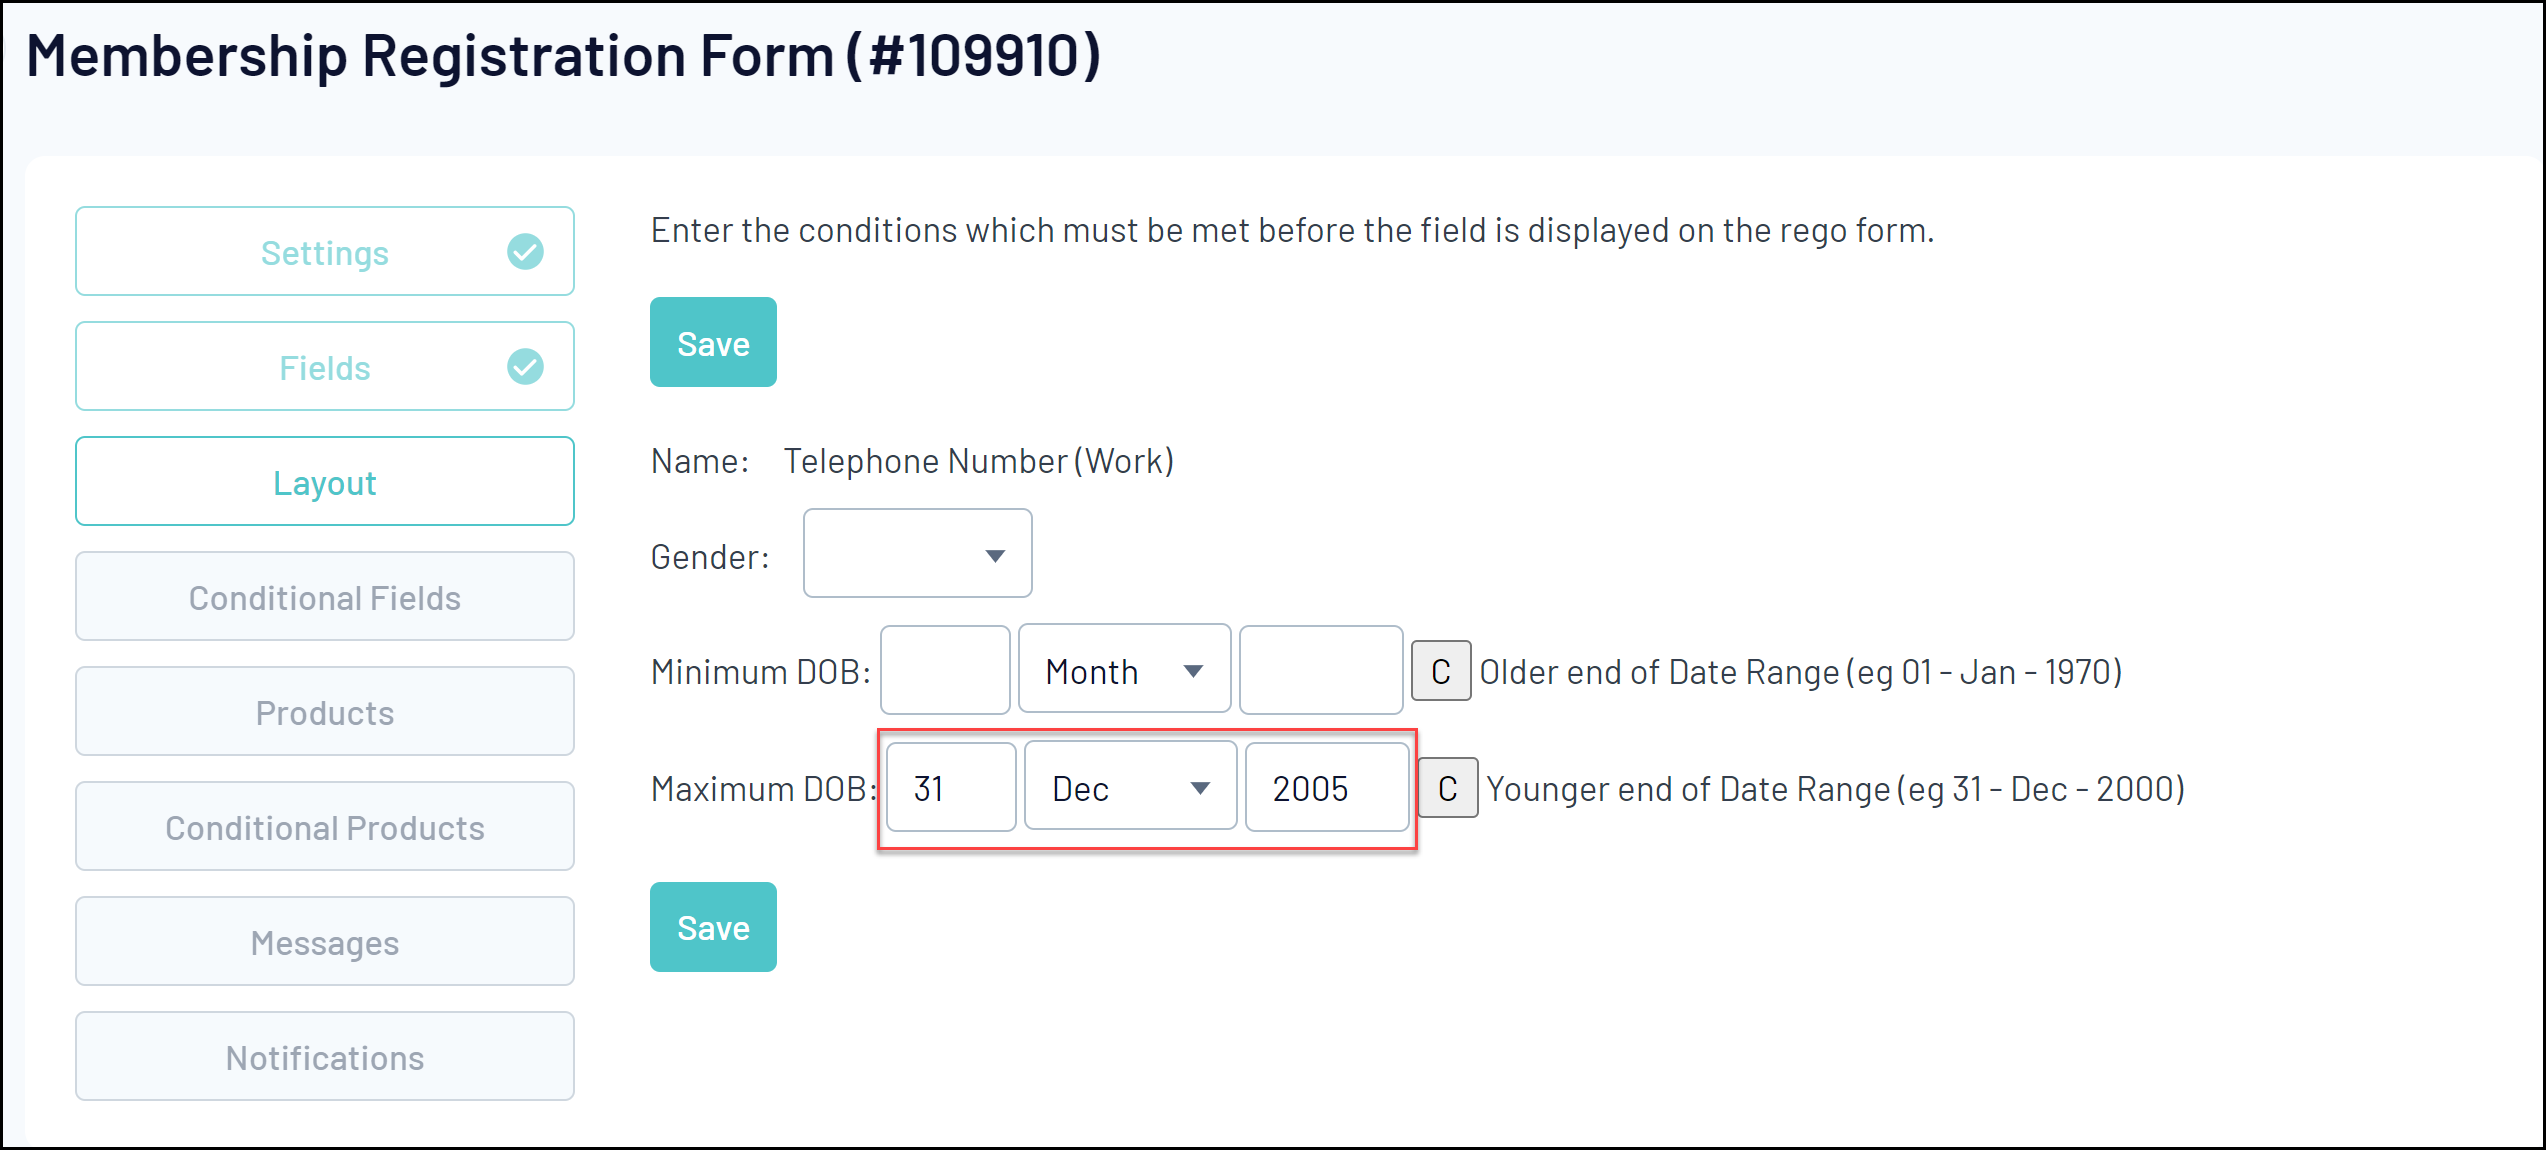
You also have the ability to apply Display Rules to specific fields. For example, you might want to hide the Parent/Guardian fields from registrants over the age of 18, or hide a Telephone Number field from registrants under 18.
To add a Display Rule to a field, click the RULES button next to the corresponding field:

Choose to display the field to a specific gender or date of birth range. In the example shown below, we are applying a Display rule based on the member's date of birth so that the Telephone Number (Work) field only displays to members born before 31 December 2005
5. Products Tab
5a. The Products tab allows you to link previously created products to your registration form.
Any products that you tick in the Active column highlighted below will display on your registration form.

The Mandatory checkbox option will set the product as pre-selected for the member.

For information on creating a Product, please see our Create a Product article.
6. Messages Tab
6a. The Messages tab allows you to add custom text throughout the registration form process to act as a guide for your members completing the form, including a dedicated section for Terms & Conditions.
The tabs along the top of the page represent different pages of the registration form, as well as an option to display an Unavailable Message which will display to members trying to access the form if it is inactive.

Terms & Conditions can be added in the Questions tab and can be made mandatory in order to proceed through the registration process.

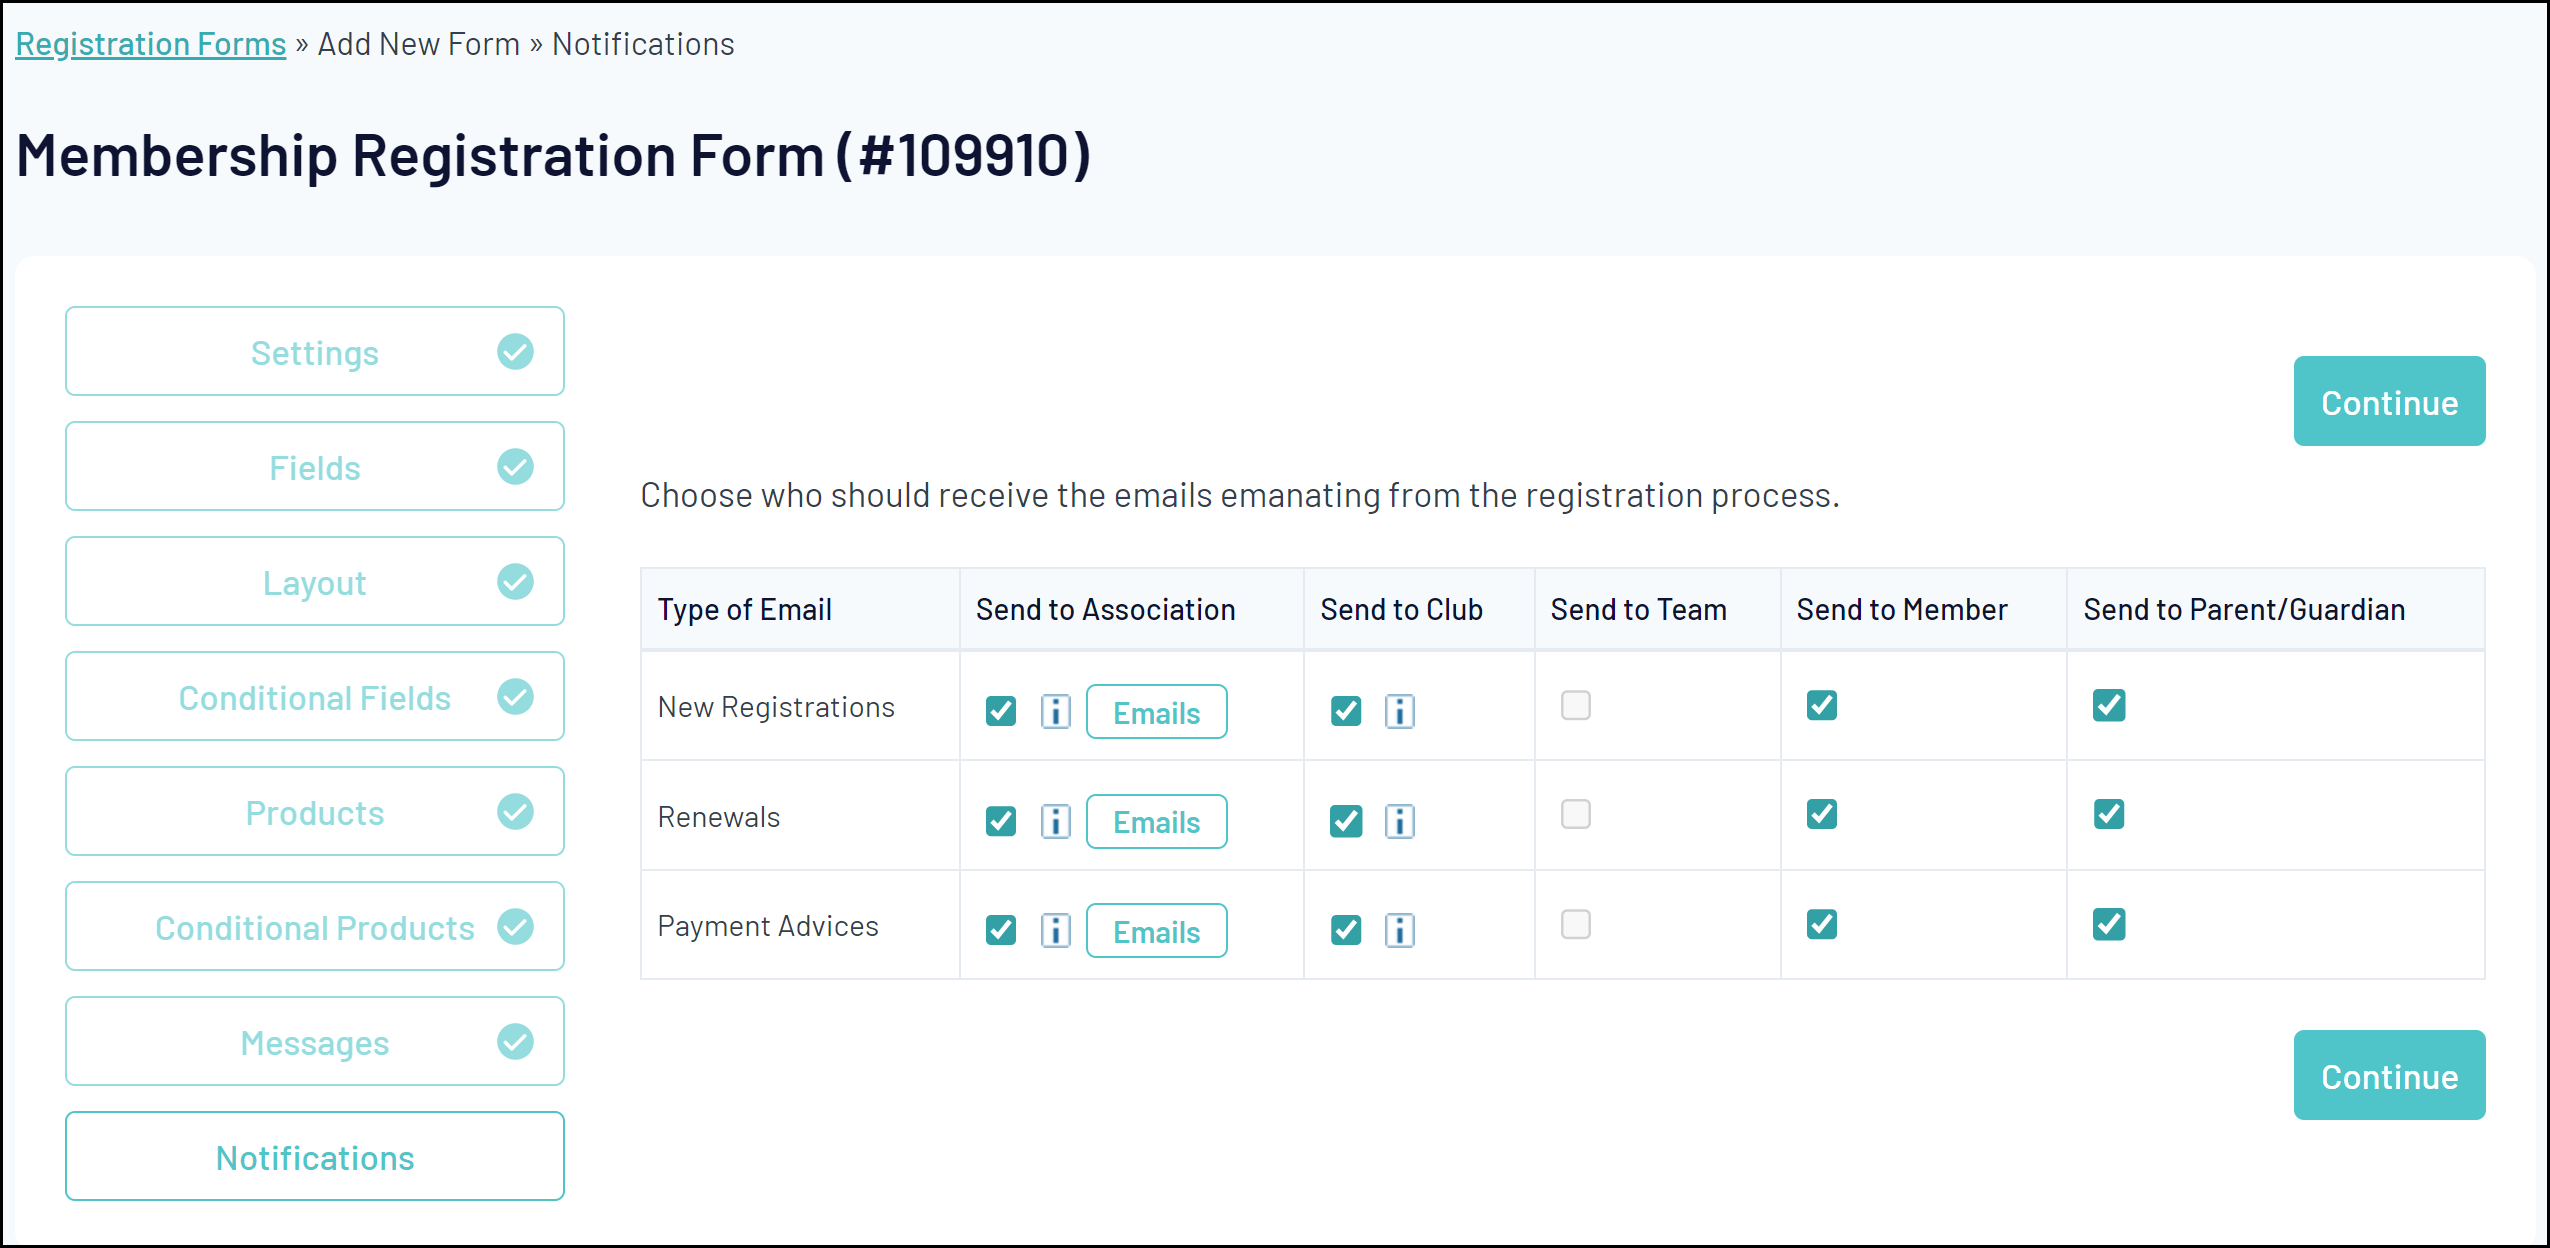
7. Notifications Tab
7a. The Notifications tab allows you to choose who should receive emails following a completed registration. You will need to ensure Organisation Contacts have been entered ensuring that the email is received as intended. For information on entering Contacts, please see our Contacts article.
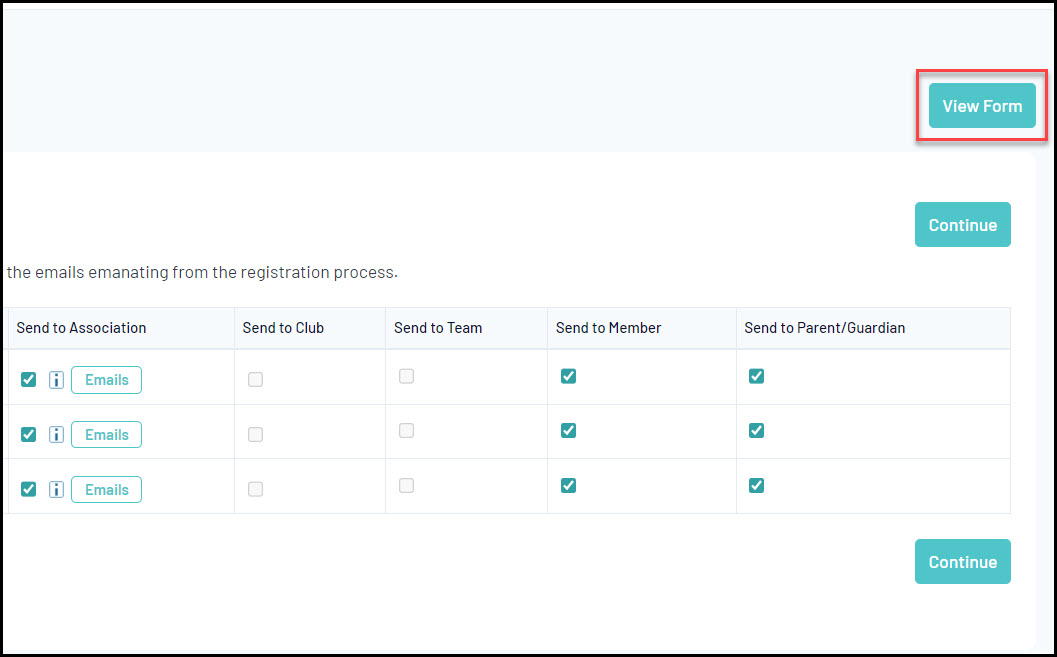
8. Viewing Your Registration Form
You can view the front-end version of your form by clicking the VIEW FORM button at the top of the form editor.
If you are logged into an Association or Club, you can also view your form by navigating to Registrations > Registration Forms > Click the VIEW link next to the applicable form.
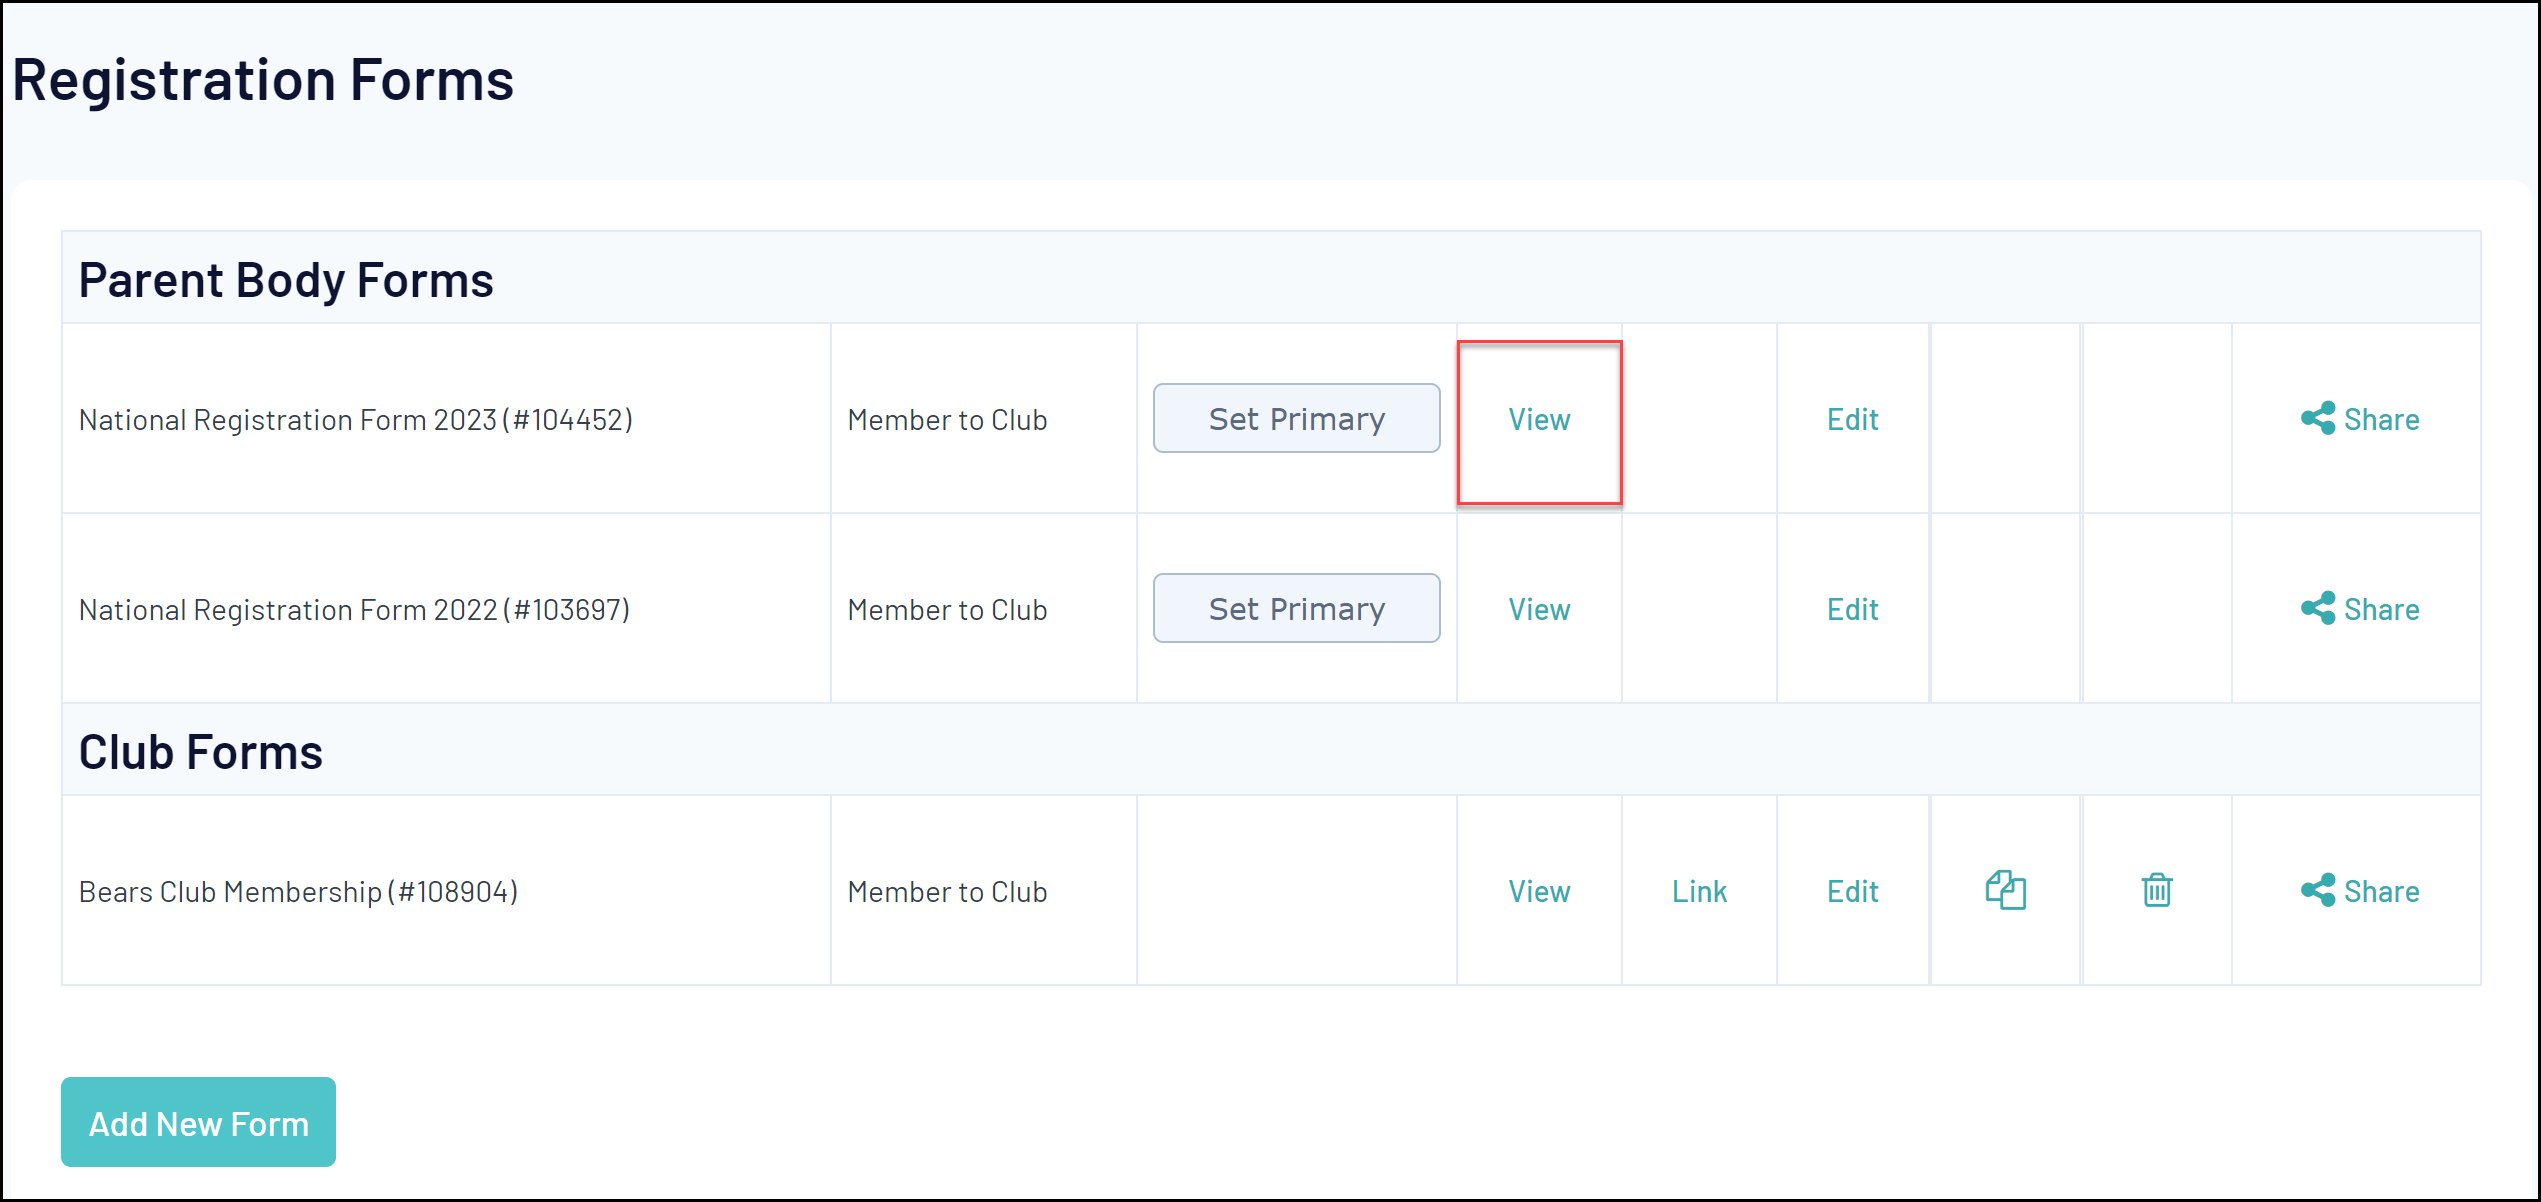
This will open the front-end version of your registration form, allowing you to see exactly what your members will see when registering through the form.