
Firstly, login to your Online Membership Database - If you don’t have your login details please contact your State Governing Body or Association.
Products refer to fees that can be purchased by members as part of your registration process. Examples of products may include registration fees, playing gear, merchandise or event tickets.
Merchandise Products can be created within any organisation's back end Passport database and attached to Registration Forms in order to surface additional products or packs that you might want to include as part of the registration.
Below are detailed examples of how to create your product:
1. On the left-hand menu, click Registrations, then select PRODUCTS

2. Click the ADD A NEW PRODUCT button
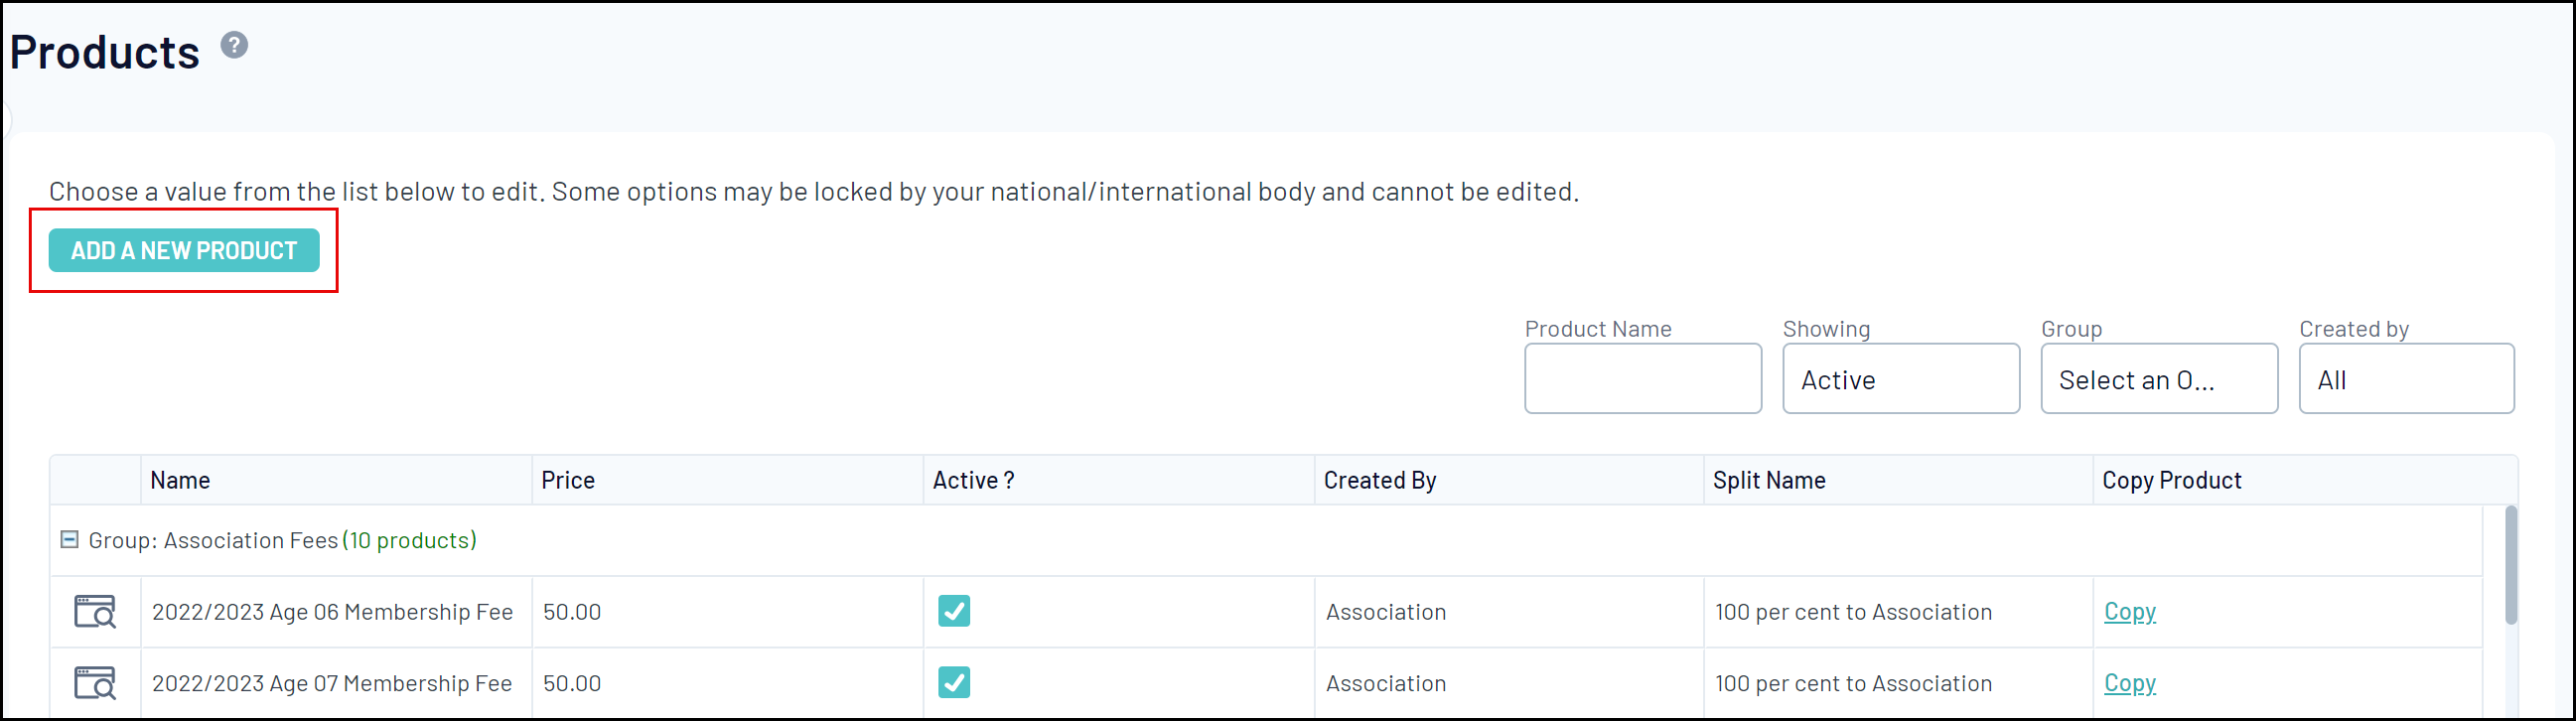
3. Complete the following details:
Details Tab

Name: This will be the name of the product as will be displayed to members
Product Reporting Season: The season that the product applies to. For example, if your product is active for your 2023 Winter season, select this in this drop-down selection. This will assist in reporting on which products were purchased in which season.
Grouping Category: This will allow your products to be grouped together on your registration form and back end product list. For ease of navigation on your Product List, you might want to add 'Merchandise' or something similar for this product and other merchandise items.
Product Type: Select Merchandise
Allow Multiple time purchasing: This will allow a product to be purchased on more than one occasion. For example, a member can log in to the form in March to purchase the product, then come back in June and purchase the same product again.
Allow Multiple quantity purchasing: This will allow a quantity of more than one to be purchased within the same registration.
Notes: This will allow you to include any additional information about the product which can be seen by members when the product is attached to a registration form.
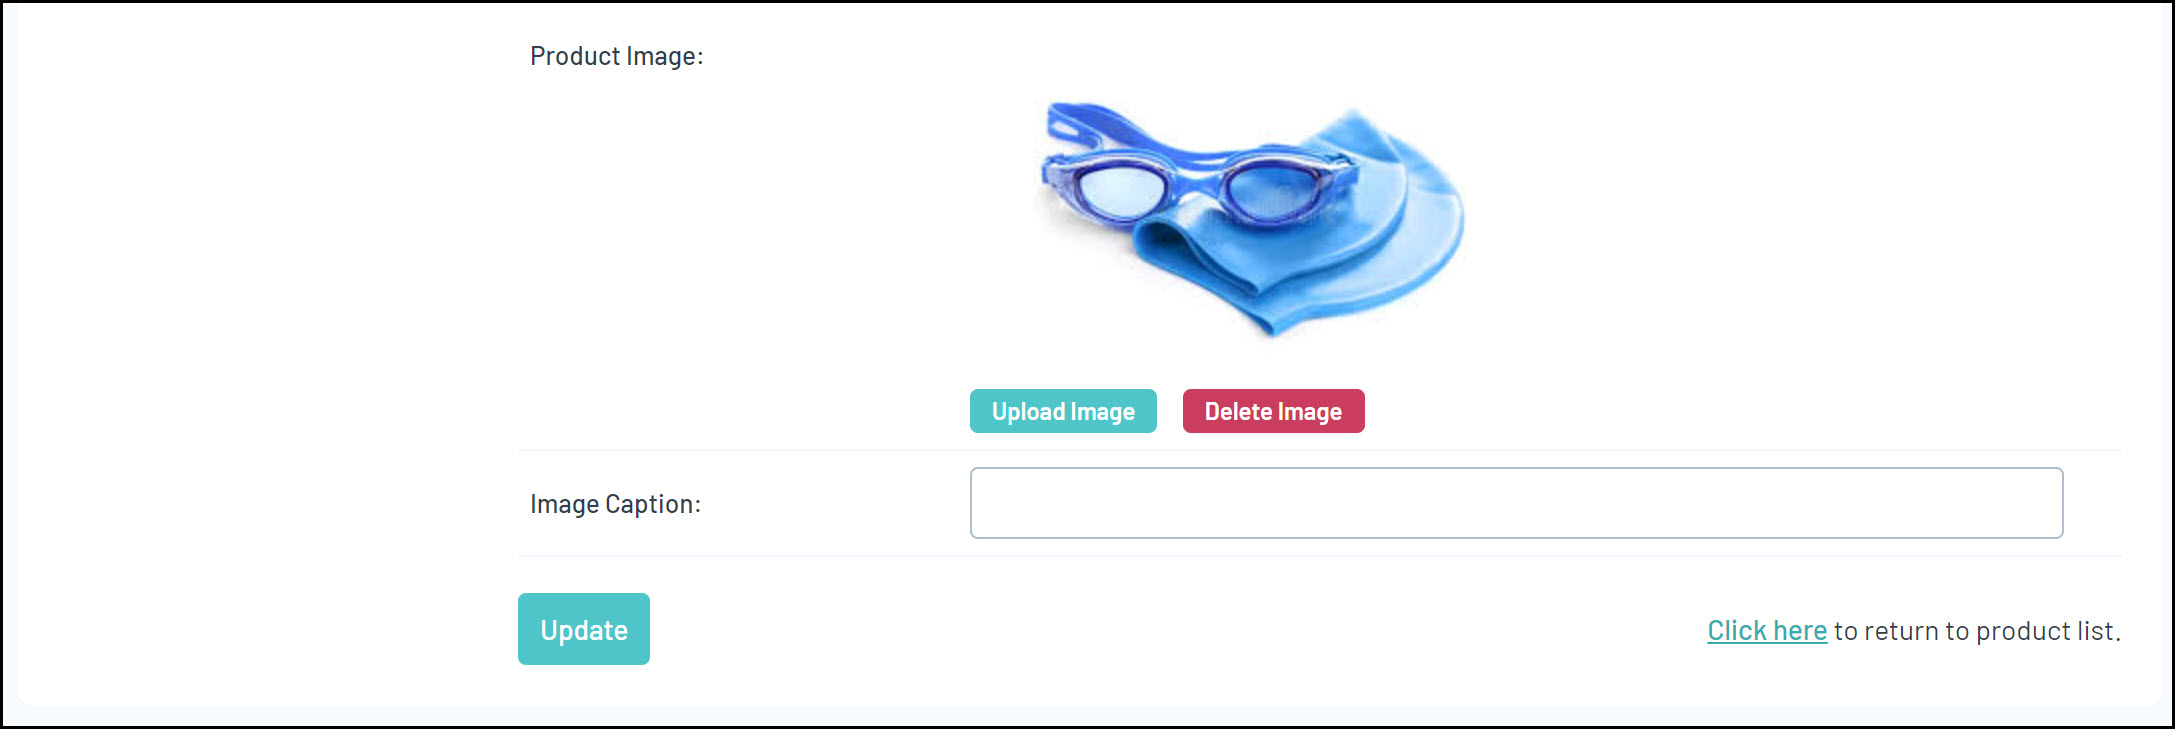
Product Image: You might like to upload an image which displays the merchandise the member is purchasing.
Image Caption: Add any additional text to explain the image.
Note: In order to upload an image to a product, you must have a Bank Account entered into your database.
Pricing Tab
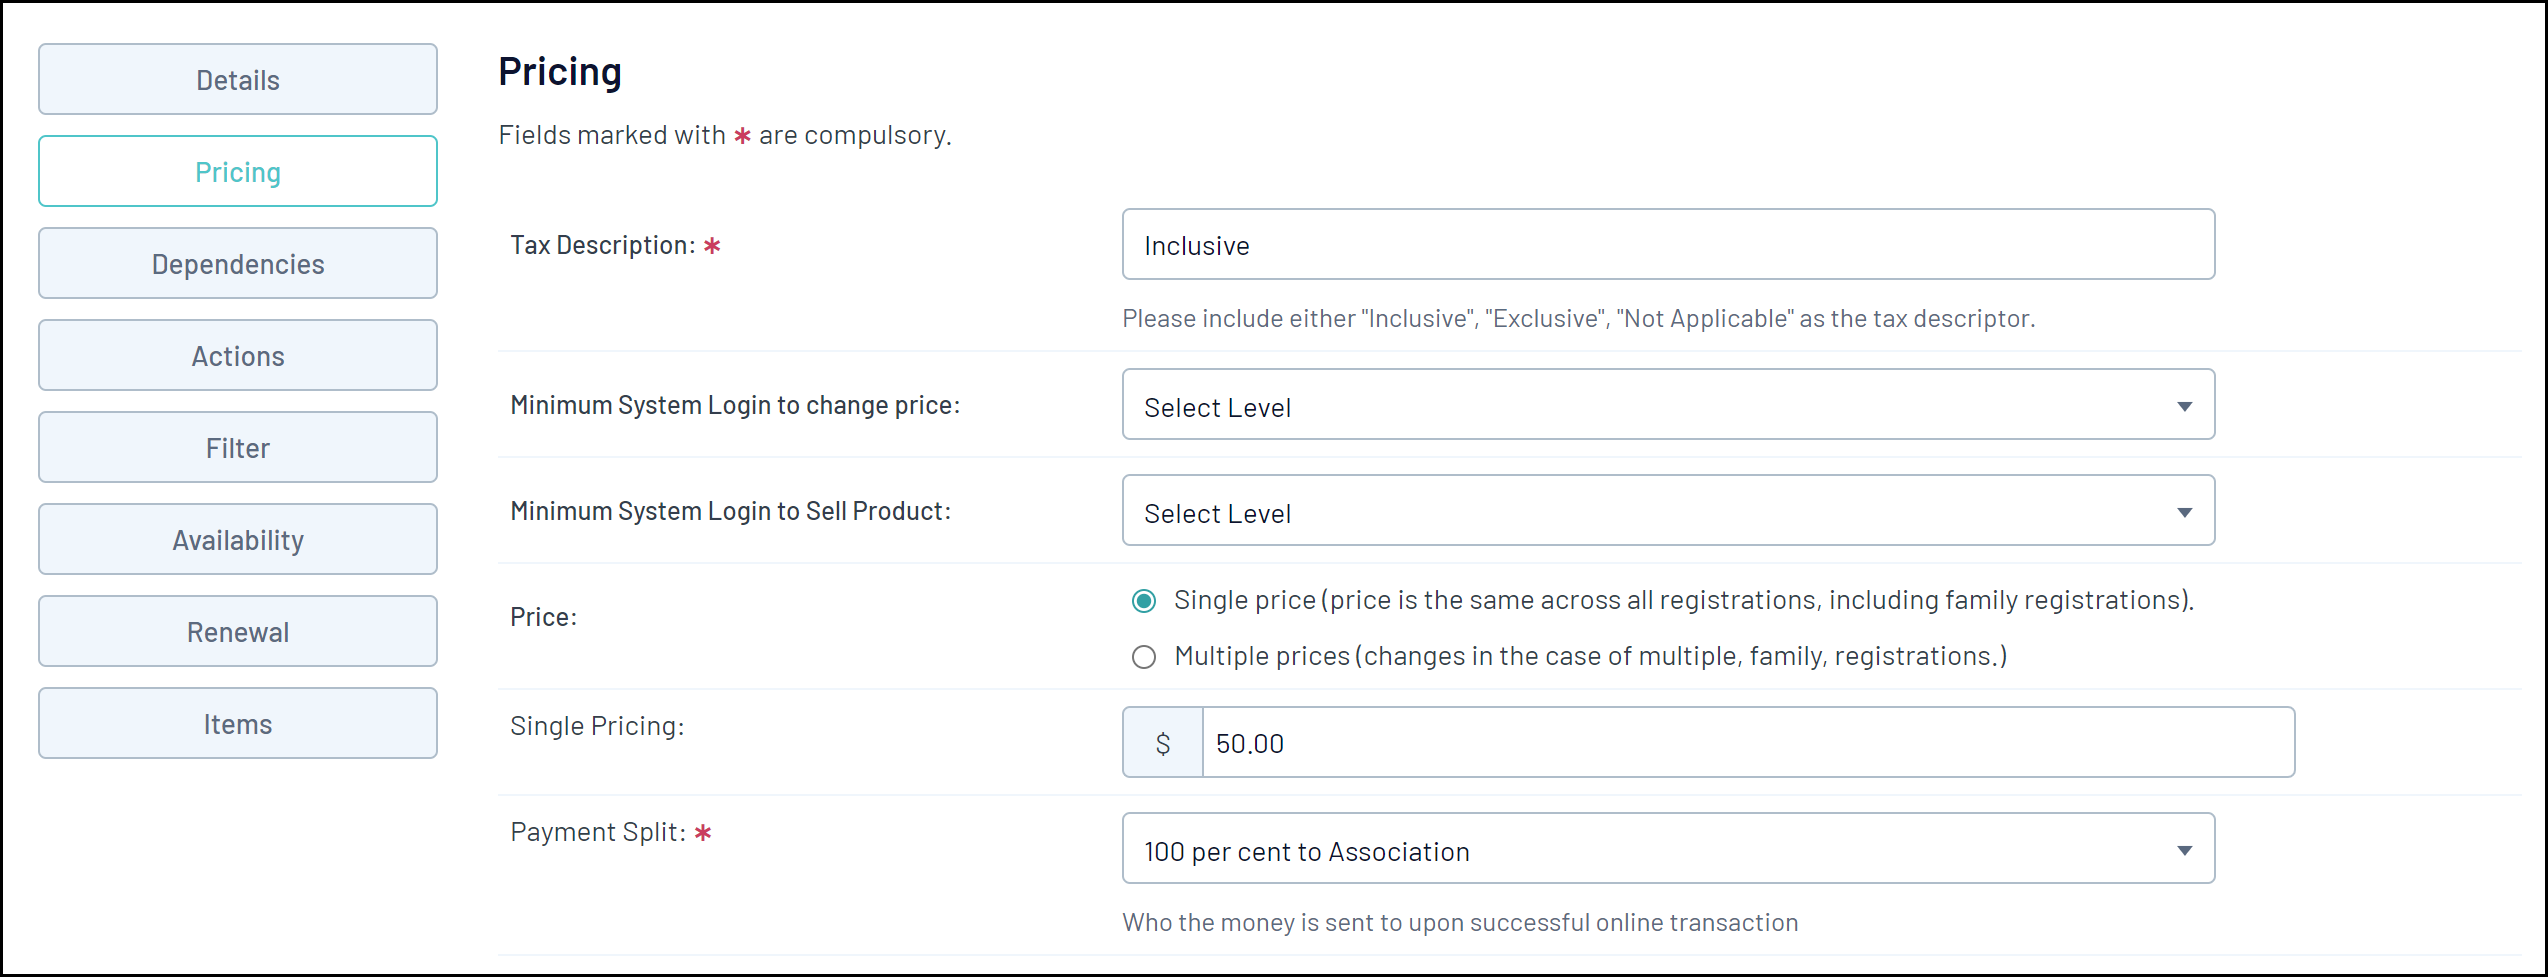
Tax Description: This option should be set to Inclusive, and displays on payment confirmation emails received by members
Minimum System Login to change price: The level at which the price of the product can be changed. If for instance an association sets up a product and sets this option to Association, the organisations under the association in the hierarchy won’t be able to change the price of the product.
Minimum System Login to sell product: The minimum level at which a product can be added to registration forms.
Price: Select whether the product is a single price or multi-price (i.e. discount for multiple registrations)
Single Pricing: Price of the product if single pricing is selected
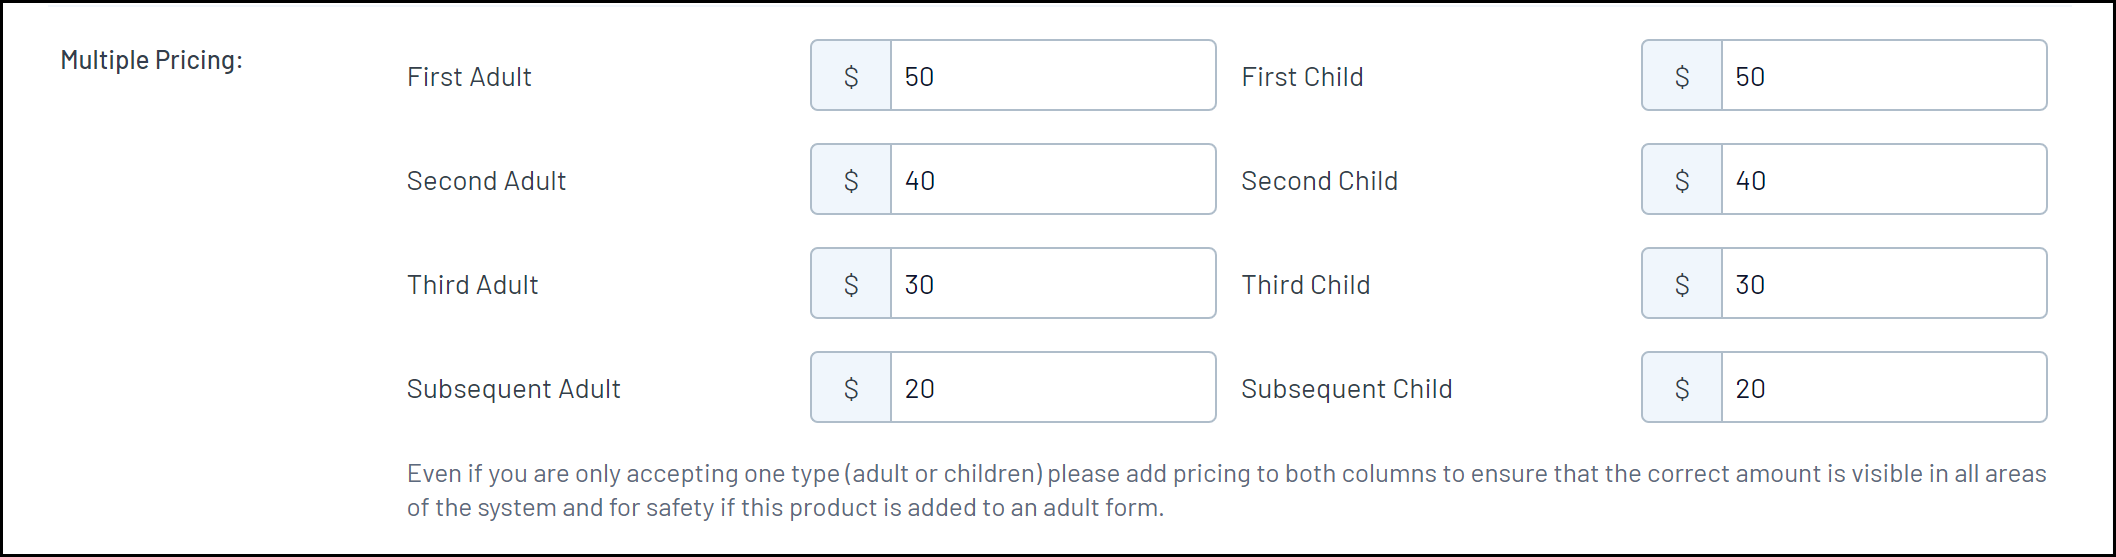
Multiple Pricing: Allows you to create a multiple pricing system, whereby the first adult or child's price can differ from that of the second, third or subsequent member registered as part of the same registration session, as shown below:
Payment Split: Determines where the funds for this product will be sent, based on the bank account added to Passport at each level. For example, selecting 100% to Club will ensure all incoming funds for this product are distributed to the bank account added within the club database.
Click here for more information on adding bank accounts to Passport.
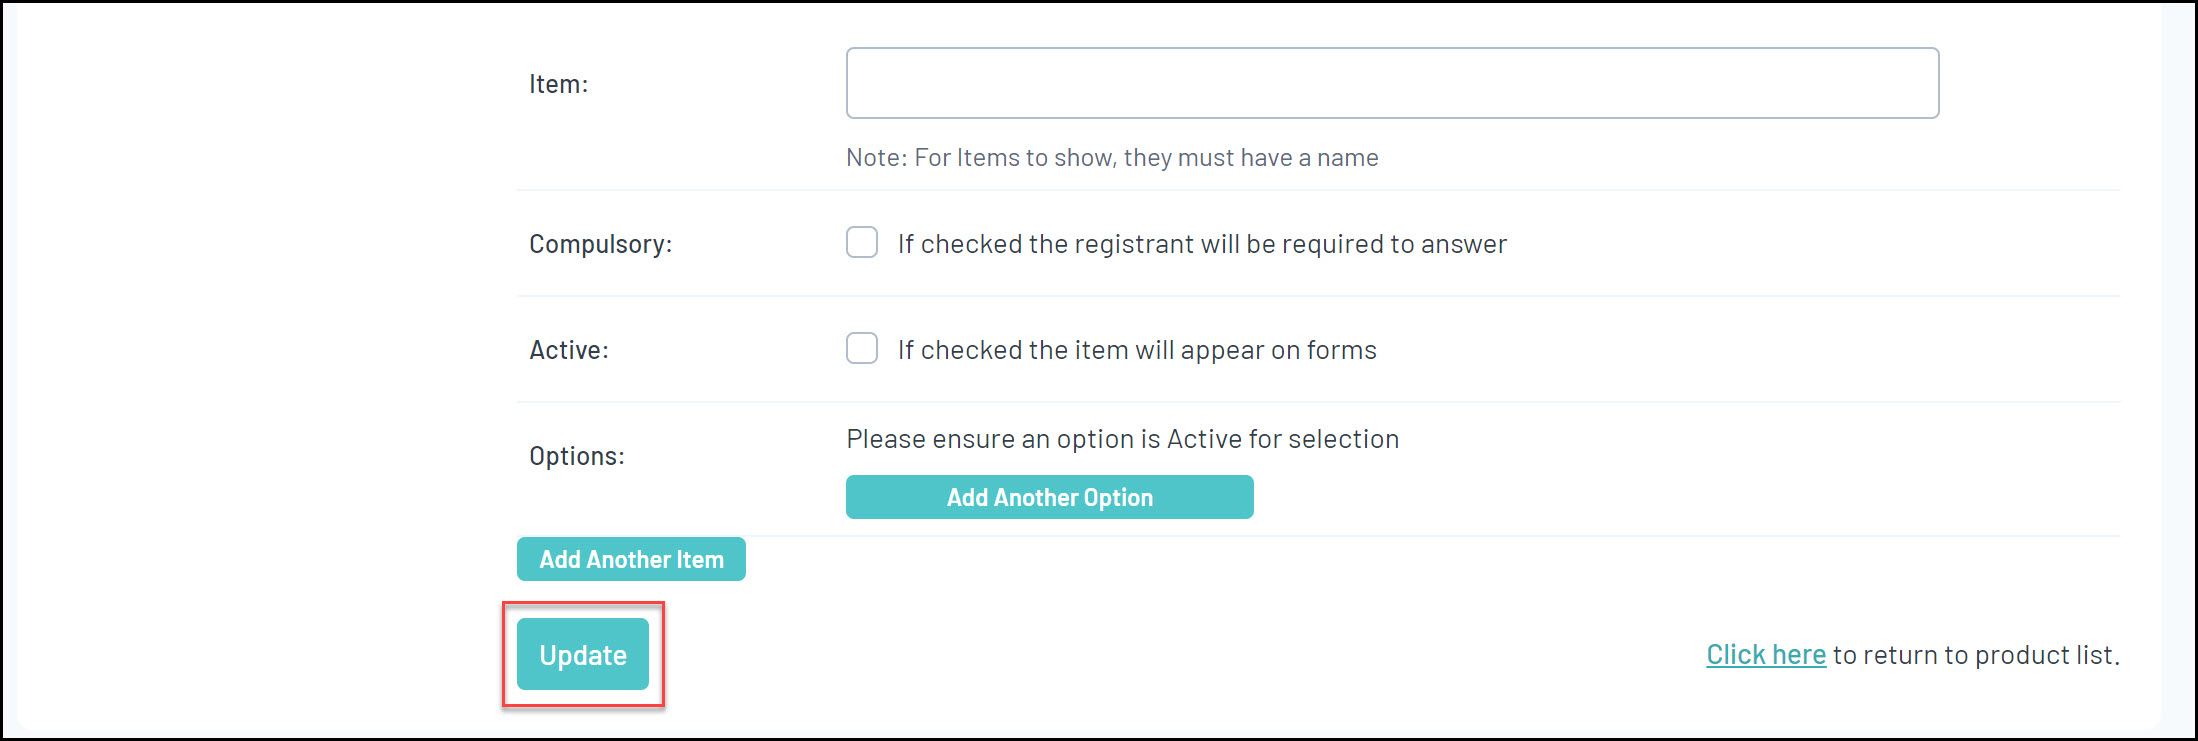
Items Tab
The eighth tab on the Add/Edit Products screen is Items. This gives administrators the ability to offer additional add-on items for a specific merchandise product, such as a T-Shirt or a Cap.
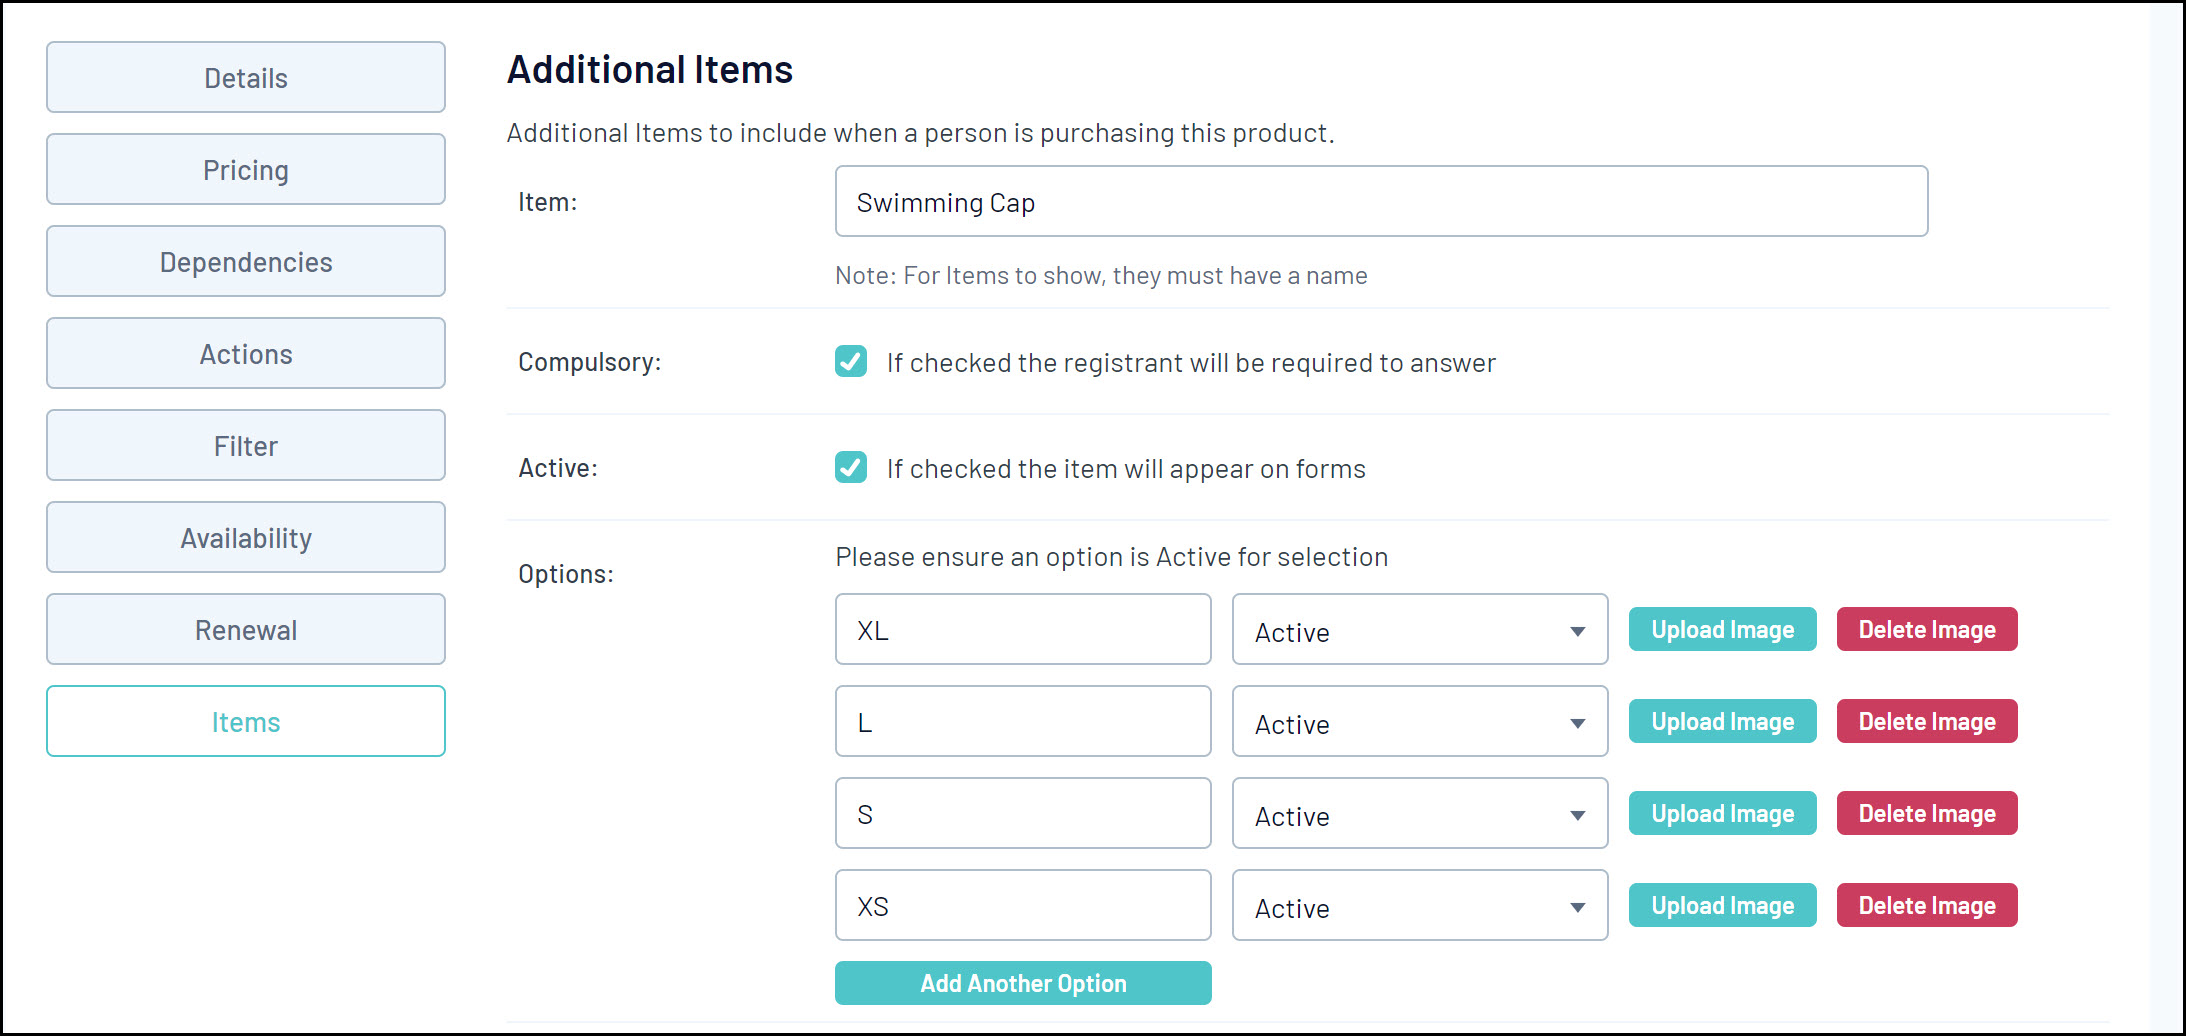
Item: Add the question you wish to ask (eg. T-Shirt Size)
Compulsory: Select whether the item is required to be selected by members
Active: Select whether the item is to be shown on the form for members
Add Another Option: Add each selectable option (e.g. Small, Medium, Large)
Note: Whilst not essential, you may also want to review the Dependencies, Actions, Filter, Availability and Renewal tabs in the product creator. Click here for more information on the complete functionality available when creating a product.
4. Once you've finished creating your product, click Update
5. Add the product to a registration form through the following steps:
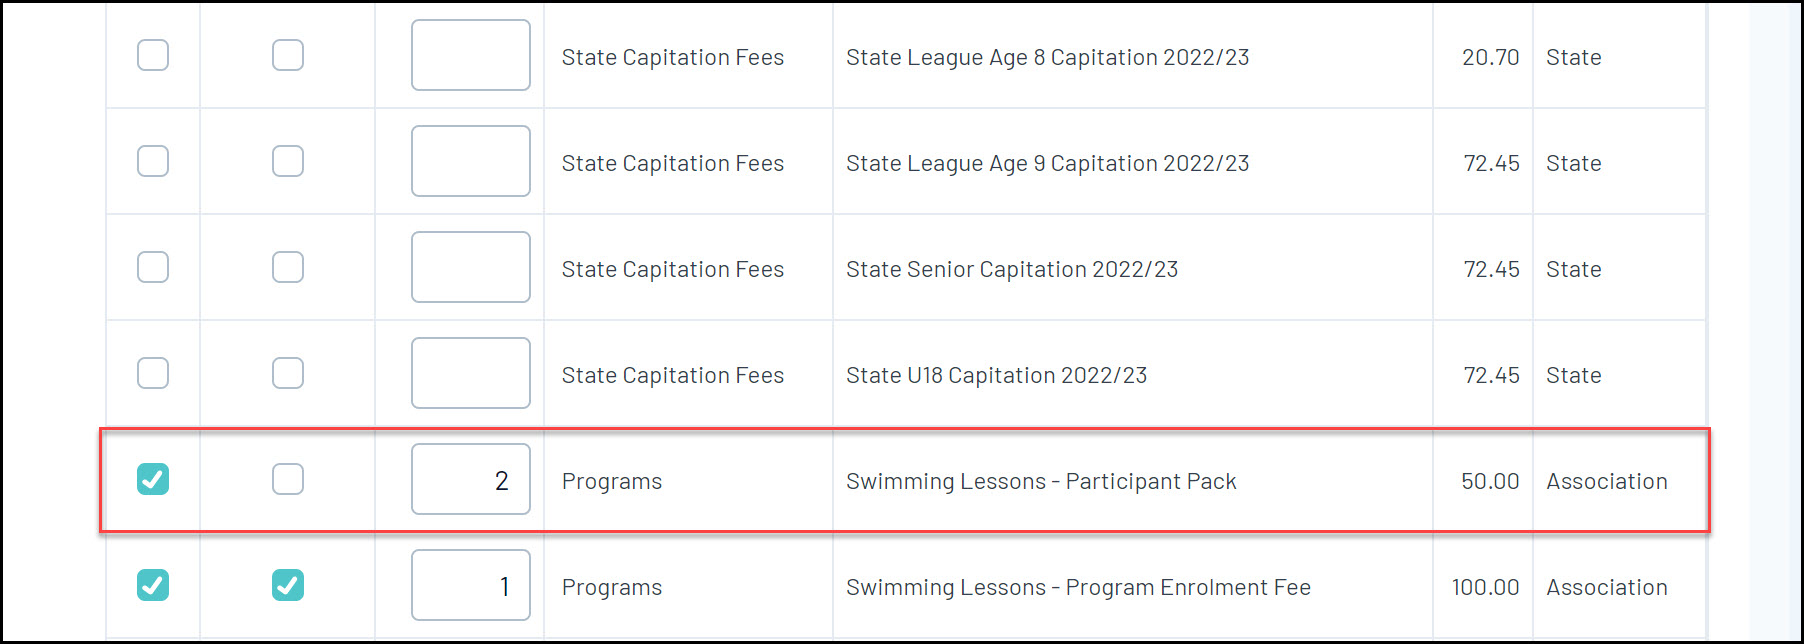
Click the Registrations menu in the left-hand side > click Registration Forms > Edit a Registration Form > click the Products tab > Find your merchandise product and tick the Active and/or Mandatory checkboxes > click SAVE.
Your merchandise products will then be available to select as part of the registration form!
