
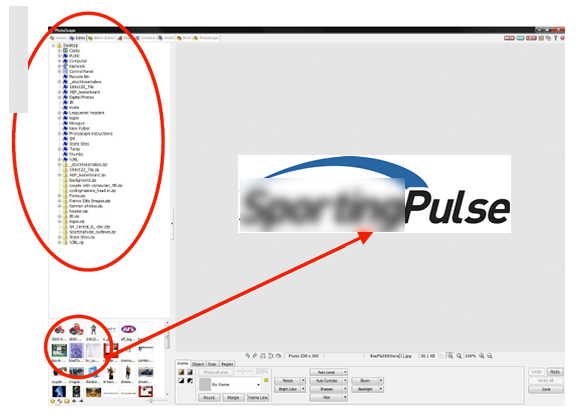
Photoscape is free easy to use photo editing software which can be downloaded from www.photoscape.org/ There are many other image programs out there but we have found that this program is very simple to use for the purpose of resizing and cropping images for news articles.
Using Large Images
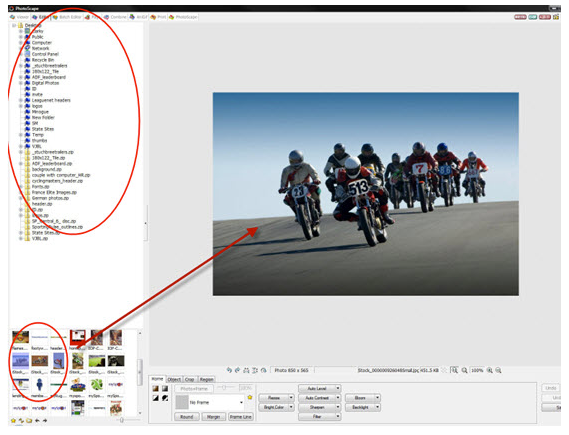
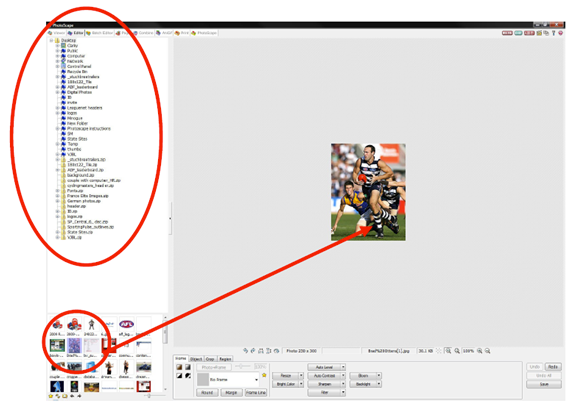
1. Open Photoscape and select Editor Icon
2. Select Photo you wish to edit in the left menu. It will then appear in the right panel.
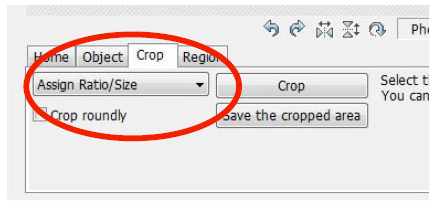
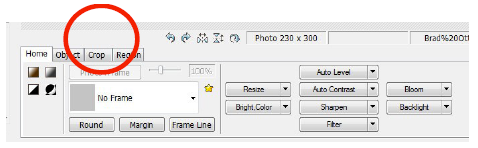
3. Select Crop Tab

4. Click on "crop freely" and select the "assign Ratio/size" button
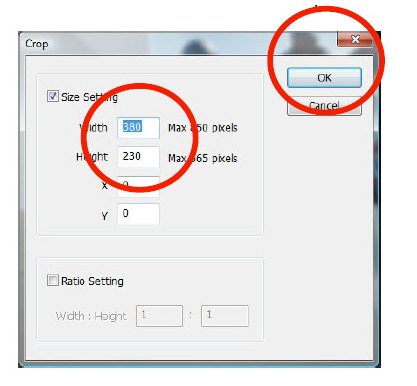
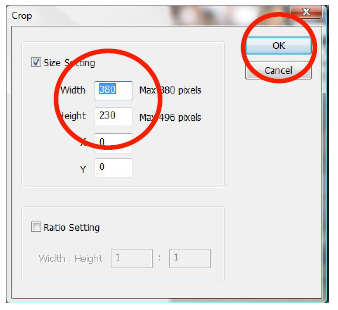
5. In the crop screen that follows please input your desired size you wish the final result to be. (SportingPulse will instruct you on what the desired dimensions for your news article images are) For this example we will use 380px (width) by 230px (height). Click OK
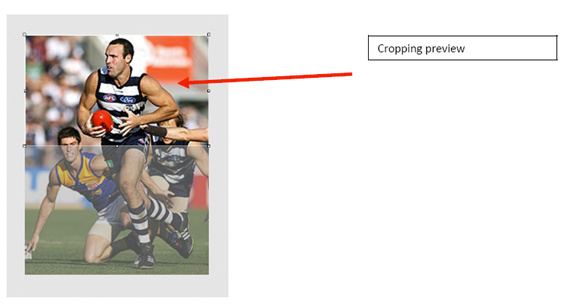
6. Preview will look like this with a rectangle showing how the cropped image will look at present
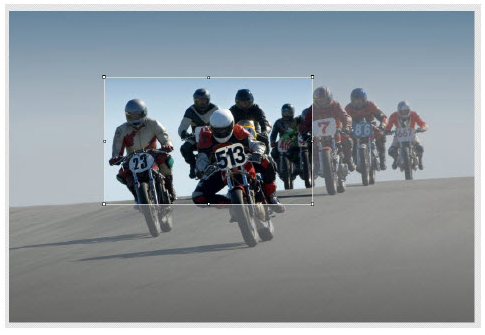
7. Move the rectangle panel to the area you would like to crop to by grabbing the rectangle with the mouse and dragging it to the desired position
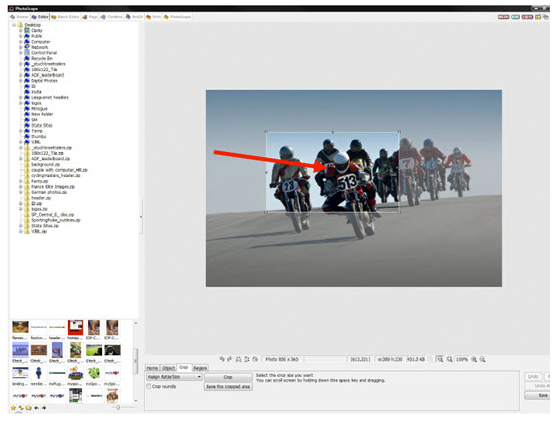
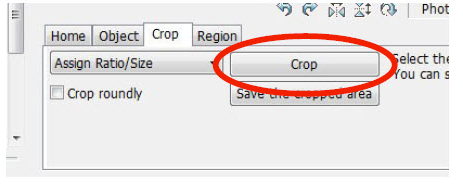
8. Hold down shift and drag the corners of the rectangle out to cover the detail in the photo you want to keep. See below. (Image is nicely framed)
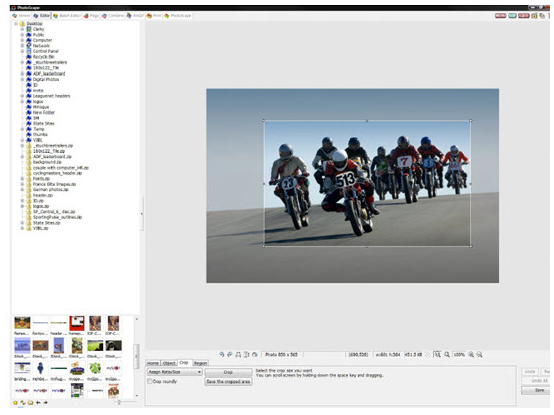
9. Click on "crop" to remove unwanted portion of image.
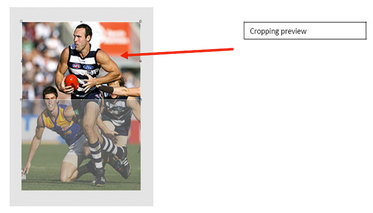
10. Your image will now look like this.
11. This is larger than the 380 pixels wide by 230 pixels high, however the ratio between height and width is correct and when you add this to a news article, Typo3 will auto resize the image for the homepage display, and the full page article.
12. Last step is to save the image. Click on "Save" in the bottom right corner, select "save as" which is the third option that comes up. This allows you to select a Folder and give the file a name. Clicking save opens up a quality setting, I recommend you select 80% and then save the file. It is ready to be added to your news articles.
Using Smaller Images
1. Open Photoscape and select Editor Icon
2. Select Photo you wish to edit in the left menu. It will then appear in the right panel. Note, it is smaller than the required size, however still a reasonable image to use for the website. Please ensure you don’t use images that are too small as they will look blurry and of a poor quality when enlarged
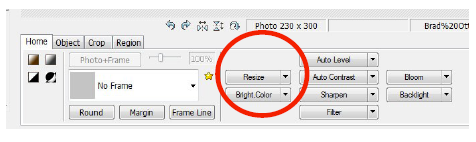
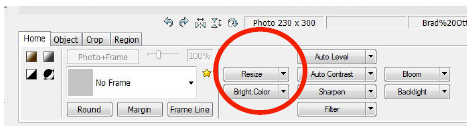
3. Click "resize" from the menu at the bottom of the screen
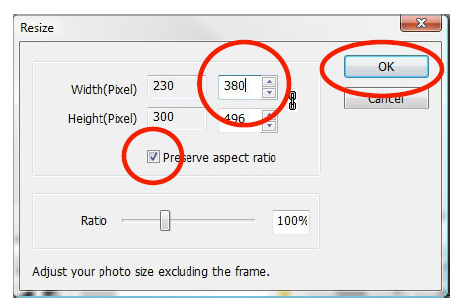
4. In the follow pop-up screen that appears, please ensure the "preserve aspect ratio" box is ticked.
- Input the width of the final image (380 pixels)
- Leave the height as is
- Click OK
5. Click on crop Tab in bottom menu
6. In the pop-up menu. Input the final cropped size in (380 pixels wide and 230 pixels high). Click OK
7. Your preview will now look like this.
8. Grab the image by clicking and holding with the mouse and drag the frame up or down till you are happy with where the cropping frame is positioned.
9. Click on "Crop" to remove the unwanted area of the image leaving the image below.
Cropping preview
10. What you are left with is an image correctly sized to 380 pixels to 230 pixels for your news articles.
11. Last step is to save the image. Click on "Save" in the bottom right corner, select "save as" which is the third option that comes up. This allows you to select a Folder and give the file a name. Clicking save opens up a quality setting, I recommend you select 80% and then save the file. It is ready to be added to your news articles.
Create image with Whitespace (for logos)
1. Open Photoscape and select Editor Icon
2. Select Photo you wish to edit in the left menu. It will then appear in the right panel. SportsTG will have given you a desired size for the image space (eg sponsor logos) for this example the size required is 300px (width) x 100px (height)
3. Click "resize" from the menu at the bottom of the screen
4. In the follow pop-up screen that appears, please ensure the "preserve aspect ratio" box is ticked.
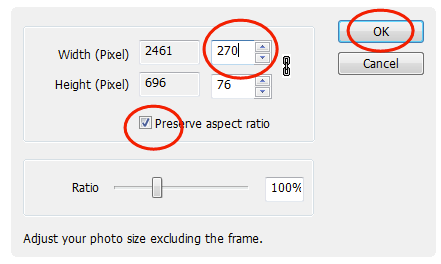
Input the width of the final image (270 pixels, as this image doesn't have any white space around it we are making it 30px smaller than the desired width so that we can add 15px to each side)
- Leave the height as is
- Click OK
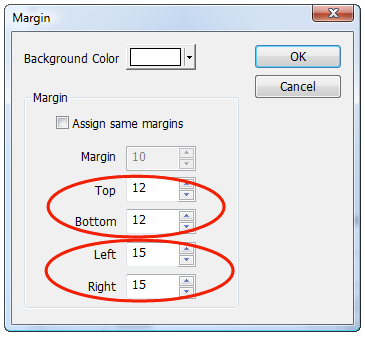
5. Now add the margin.
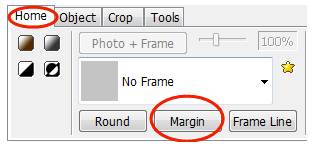
6. As discussed in point 4 give add 15 px margin to the left and right. Our current image is 76px high so we want to also add 12px to the top and bottom to get it to the desired 100px. You will also see a color there for the margin. In most cases white will be the best colour to use here.
7. We now have our image that is 300px (width) x 100px (height). If your image is smaller than the specified dimensions to begin with go straight to 5 and add the margin.
300px (Width) x 100px (Height)